Social Media Client Onboarding Template
Onboard social media clients faster with no loose ends
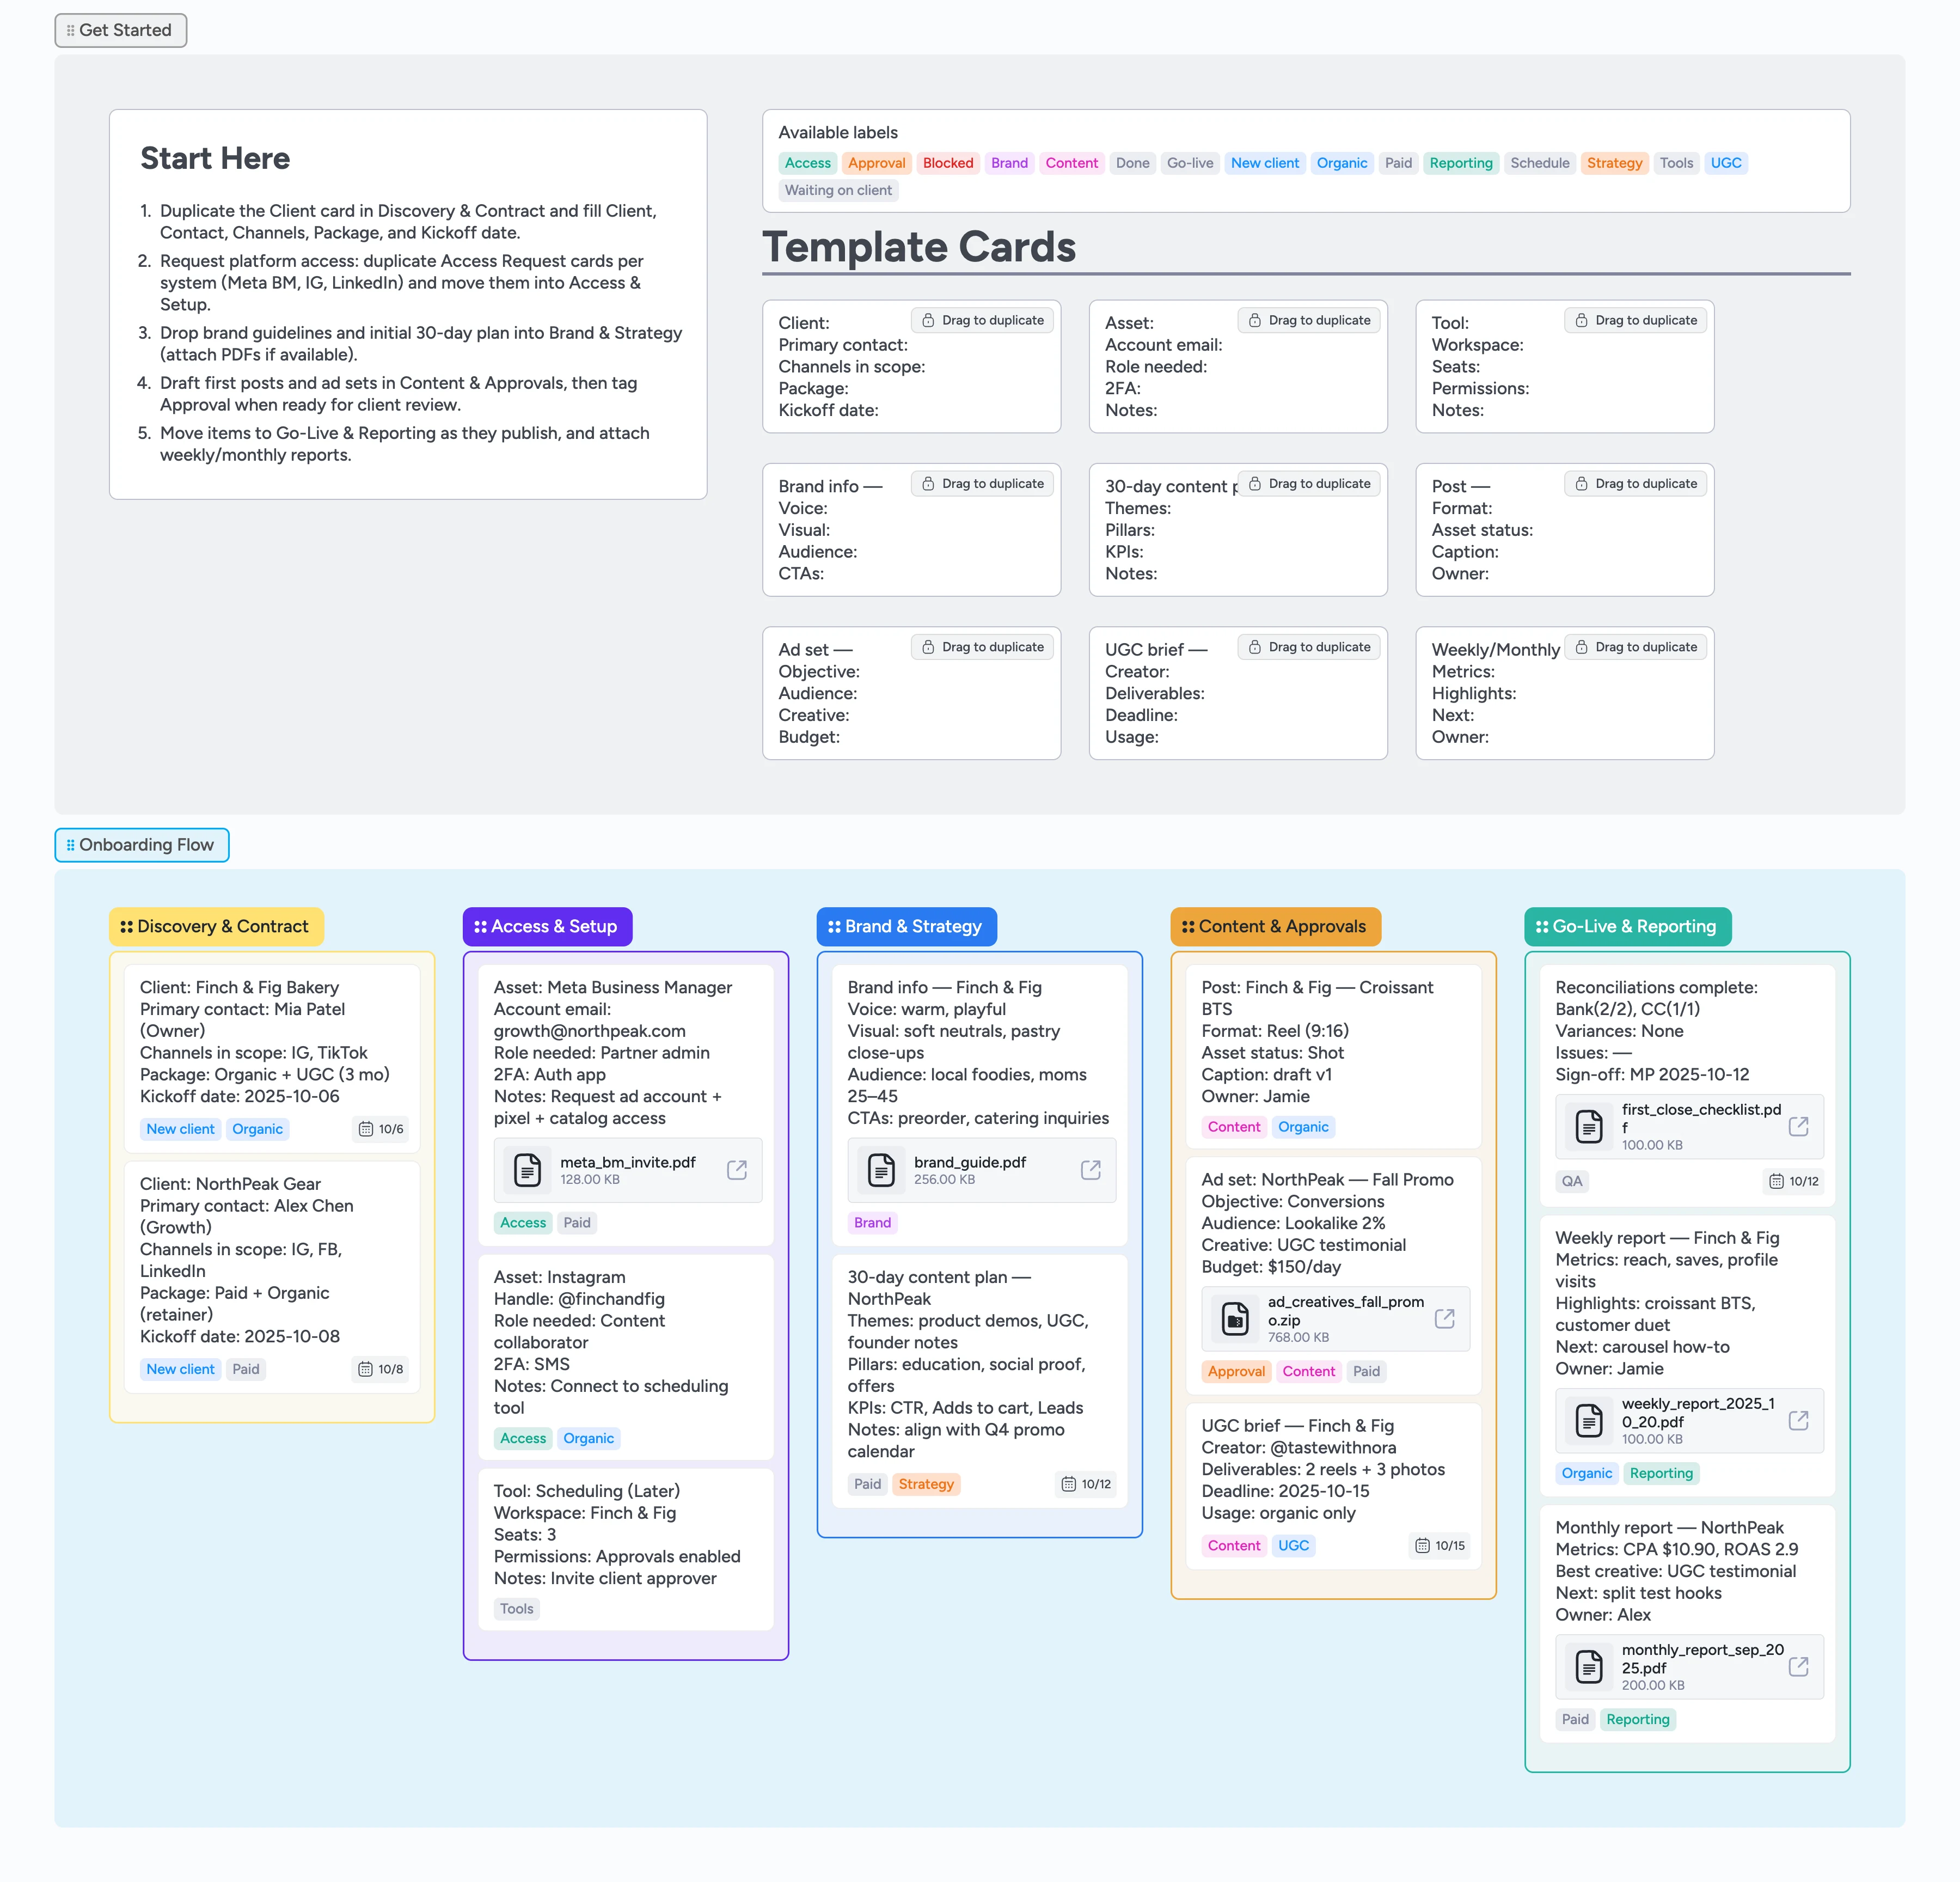
Stop chasing approvals in email threads. Onboard on a shared board where every access request, brief, and approval lives in cards your client can update directly. Request access, connect tools, lock brand voice, map the first 30‑day plan, then draft content and ad sets for approval. When items go live, keep weekly and monthly reporting in one place so the relationship stays aligned.
- Capture platform access and tool setup without email ping‑pong by giving the client a card checklist to paste credentials and confirm 2FA status
- Align on voice, visuals, and 30‑day plan before posting
- Keep drafts, briefs, and approvals visible to clients on the same board
- Move work left‑to‑right from first posts to go‑live
- Standardize reporting so wins and next steps are obvious
Start in Discovery — duplicate the Client card and fill details
Name the Client, Primary contact, Channels, Package, and Kickoff date. Set a due date to keep the start visible.
Request access per platform and tool
Duplicate Access Request and Tool Setup cards for Meta Business Manager, Instagram, LinkedIn, scheduling, and storage. Record account email, role, 2FA, and notes. Apply the Access and Tools labels.
Lock brand and goals before posting
Use the Brand Info card’s fields to capture voice, visuals, audience, and CTAs, then the 30‑day Content Plan card for themes and KPIs. Attach brand PDFs and set a due date for plan review.
Draft posts and ad sets, then request approval
Create Post and Ad Set cards with format, creative, caption/hook, audience, and budget. Apply the Approval label when ready and move to Content & Approvals.
Publish and monitor in Go‑Live
Move approved items to Go‑Live when scheduled or launched. Track first‑week KPIs and log optimization notes in card comments (hooks, thumbnails, audiences).
Report weekly/monthly and plan next steps
Use the Report card to summarize metrics, highlights, and next tests, then duplicate the card for next month so cadence stays consistent.
What’s inside
Five onboarding stages
Discovery & Contract, Access & Setup, Brand & Strategy, Content & Approvals, Go‑Live & Reporting — each stage is a list; drag cards left→right as work completes.
Reusable micro‑templates
Access Request, Tool Setup, Brand Info, 30‑day Content Plan, Post/Ad Set, UGC Brief, Weekly/Monthly Report.
Labels that surface blockers
Waiting on client, Access, Tools, Brand, Content, Approval, UGC, Paid, Organic, Reporting — filter by label to isolate each stream or blocker type.
Due dates on time‑sensitive work
Kickoff dates, UGC deadlines, go‑live windows, and reporting cadences show as card badges so slippage is obvious.
Why this works
- Centralizes access, brand, and approvals to unblock launch
- Converts vague briefs into cards with owners and due dates
- Keeps client and team aligned on one shared, real‑time board
- Standardizes reporting so next tests roll from last results
FAQ
Where do we store raw files?
Keep source files in Google Drive, Dropbox, or your DAM. Attach key PDFs or zips to cards for quick reference — the board shows badges without moving the originals.
Does this work for paid and organic?
Yes. Use Paid and Organic labels to distinguish work, then filter by label to isolate each stream. Keep access requests and tools in one place, then split content and ad sets by label.
How do approvals work?
Apply the Approval label and draft in the Content & Approvals list. Mention the client directly inside each card. Move to Go‑Live once approved.