Etsy Bracelet Orders Production Pipeline Template
Run bracelets from idea to delivery
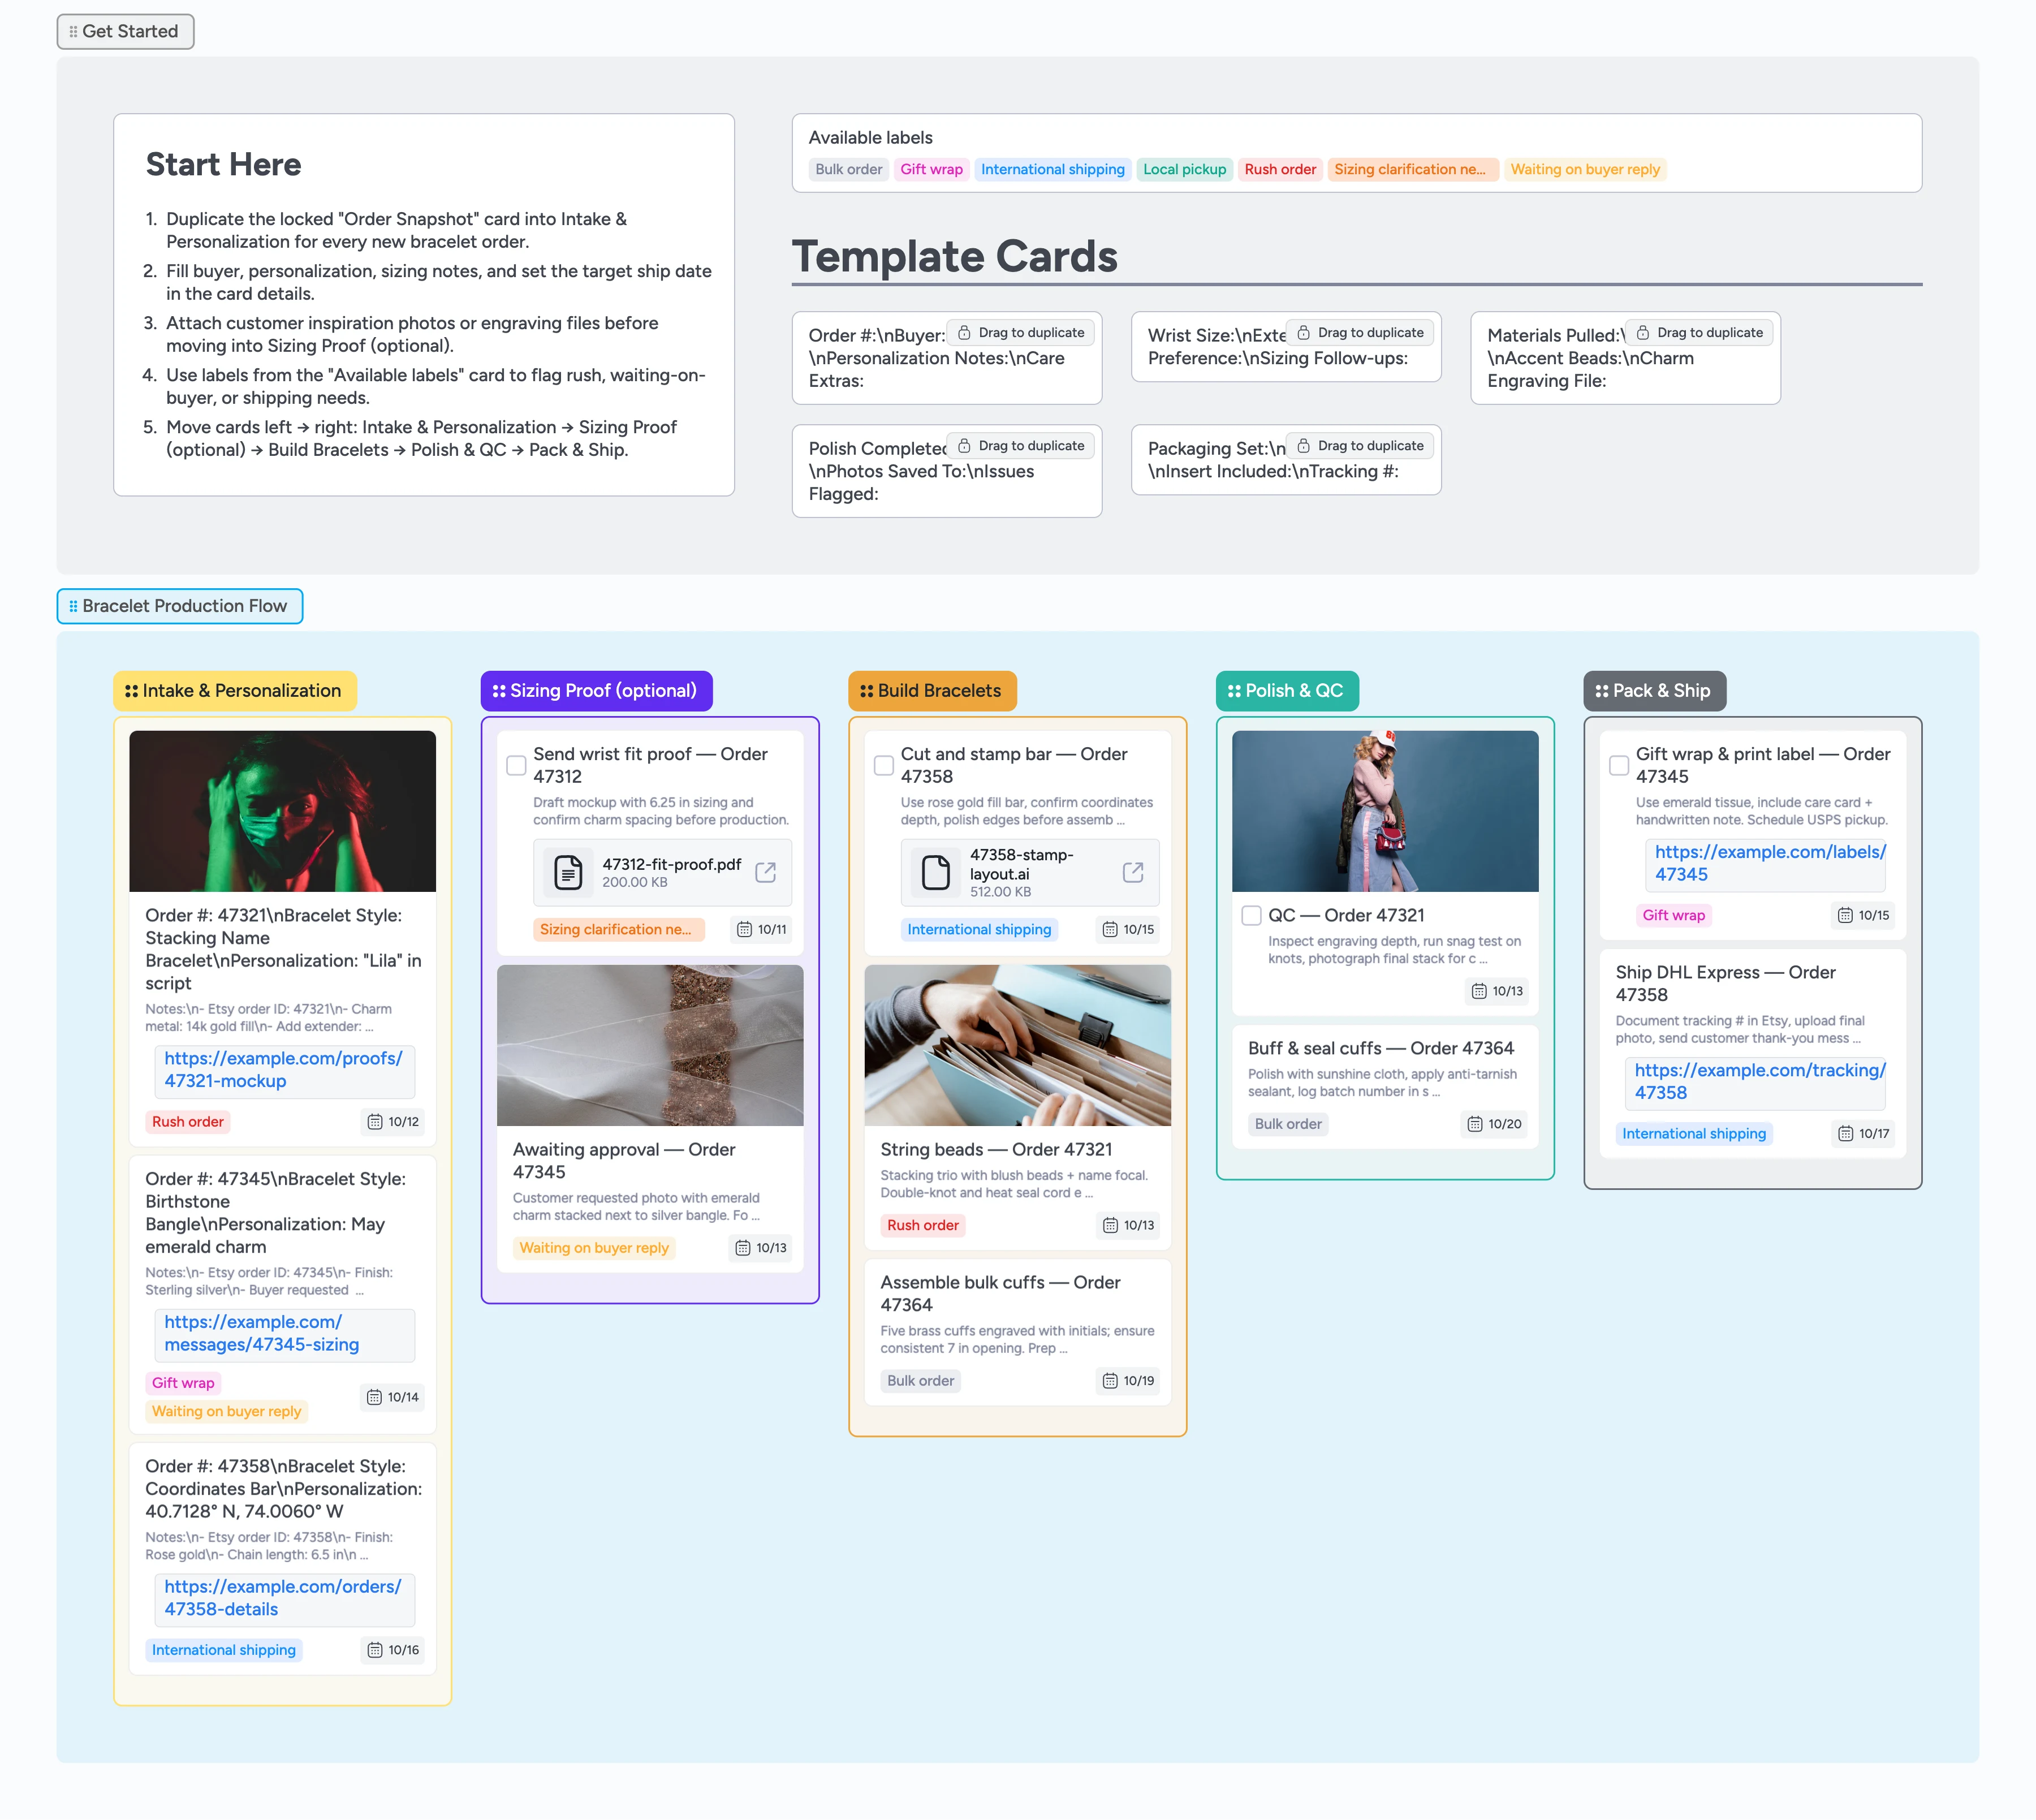
Custom bracelet orders live in Etsy messages, sketchbooks, and packing slips. This template keeps everything in one Instaboard pipeline so you capture personalization notes, confirm sizing, and finish each piece on time. Start with the Intake & Personalization section, duplicate the locked Order Snapshot card, and move the work item across sizing proof, production, quality control, and shipping so every order progresses on schedule.
- Track every bracelet order card as it moves across stages
- Capture personalization and sizing inside card descriptions and attachments
- Duplicate ready-made micro templates to prep faster
- Flag rush or pending approvals with color-coded labels
Start with Intake & Personalization
Open the Start-Here card, then duplicate the locked Order Snapshot card into the Intake & Personalization list for your next Etsy order. Fill buyer name, bracelet style, personalization notes, and care extras, then set the target ship date in the card sidebar. Attach reference photos or engraving files pulled from Etsy messages so they stay with the order. Apply labels like Rush order or Waiting on buyer reply to flag follow-ups before you move on.
Pro tip: Drop multiple cards at once if you are importing a batch night of orders.
Confirm sizing before production
Drag the card into Sizing Proof (optional) when a buyer still owes measurements or needs to approve a mockup. Use the wrist sizing micro template to log extension chains, fit preferences, and any follow-up reminders. Attach the PDF or photo proof you sent so the whole team sees exactly what the buyer approved. When sizing is locked, check off the task and slide the card into Build Bracelets.
Build bracelets with repeatable checklists
Inside Build Bracelets, duplicate the Materials Pulled card to note metal finish, bead choices, and engraving files you already uploaded. Assign the maker responsible and set due dates to keep the bench schedule tight. Spin up one card per bracelet or add subtasks for batch runs so the workload stays visible. Keep in-progress photos attached so QA can catch issues early.
Polish, photograph, and QC
Move finished pieces into Polish & QC and duplicate the polish checklist to document inspections. Capture photos, note any issues, and confirm anti-tarnish treatments before approving the order. Tag Bulk order items so the team knows to double-check counts. Once the QC task is complete, the card is ready for packaging.
Package and ship without backtracking
Shift the card into Pack & Ship and use the packaging template to note gift wrap choices, inserts, and tracking numbers. Attach the shipping label PDF or tracking link directly to the card so customer messages are easy to send. Update status labels and tag finished photos with "Marketing" before archiving the card in your reuse list. When the order is out the door, drag the card to the end of the lane to keep the dashboard clean.
What’s inside
Start-Here section
Quick primer and locked Order Snapshot card so you never forget buyer info, personalization notes, or care extras.
Sizing Proof lane
Optional stage where you duplicate sizing tasks, attach proofs, and log buyer approvals before moving on.
Production checklists
Build Bracelets list pairs materials and engraving templates with assignee tracking and due dates you control.
Polish & QC routines
Task cards remind you to buff, photograph, and document issues before anything reaches packaging.
Pack & Ship finish
Duplicate the packaging template card to record gift wrap, inserts, and tracking updates for every shipment.
Why this works
- Centralizes buyer personalization details with card descriptions and attachments so approvals never live only in Etsy messages
- Surfaces sizing and rush risks early with labels and dedicated proof tasks
- Standardizes production and QC steps with duplicate-to-use checklists
- Keeps shipping updates and tracking links tied to each order through card attachments for quick customer follow-up
FAQ
Can I repurpose this pipeline for other jewelry?
Yes—duplicate the board and tweak the micro templates or labels for necklaces, anklets, or other made-to-order pieces.
How do I store engraving files from Etsy messages?
Download the file once, attach it to the card, and Instaboard keeps it visible through sizing proof, production, and QA.
What if a customer skips the sizing proof step?
Leave the card in Intake & Personalization and jump straight to Build Bracelets—the optional stage simply keeps pending approvals organized.
Can my assistant handle packaging updates?
Absolutely—assign the Pack & Ship card, add their checklist items, and they can log tracking info without touching earlier stages.