Etsy Coordinate Jewelry Production Pipeline Template
Deliver every coordinate piece on time
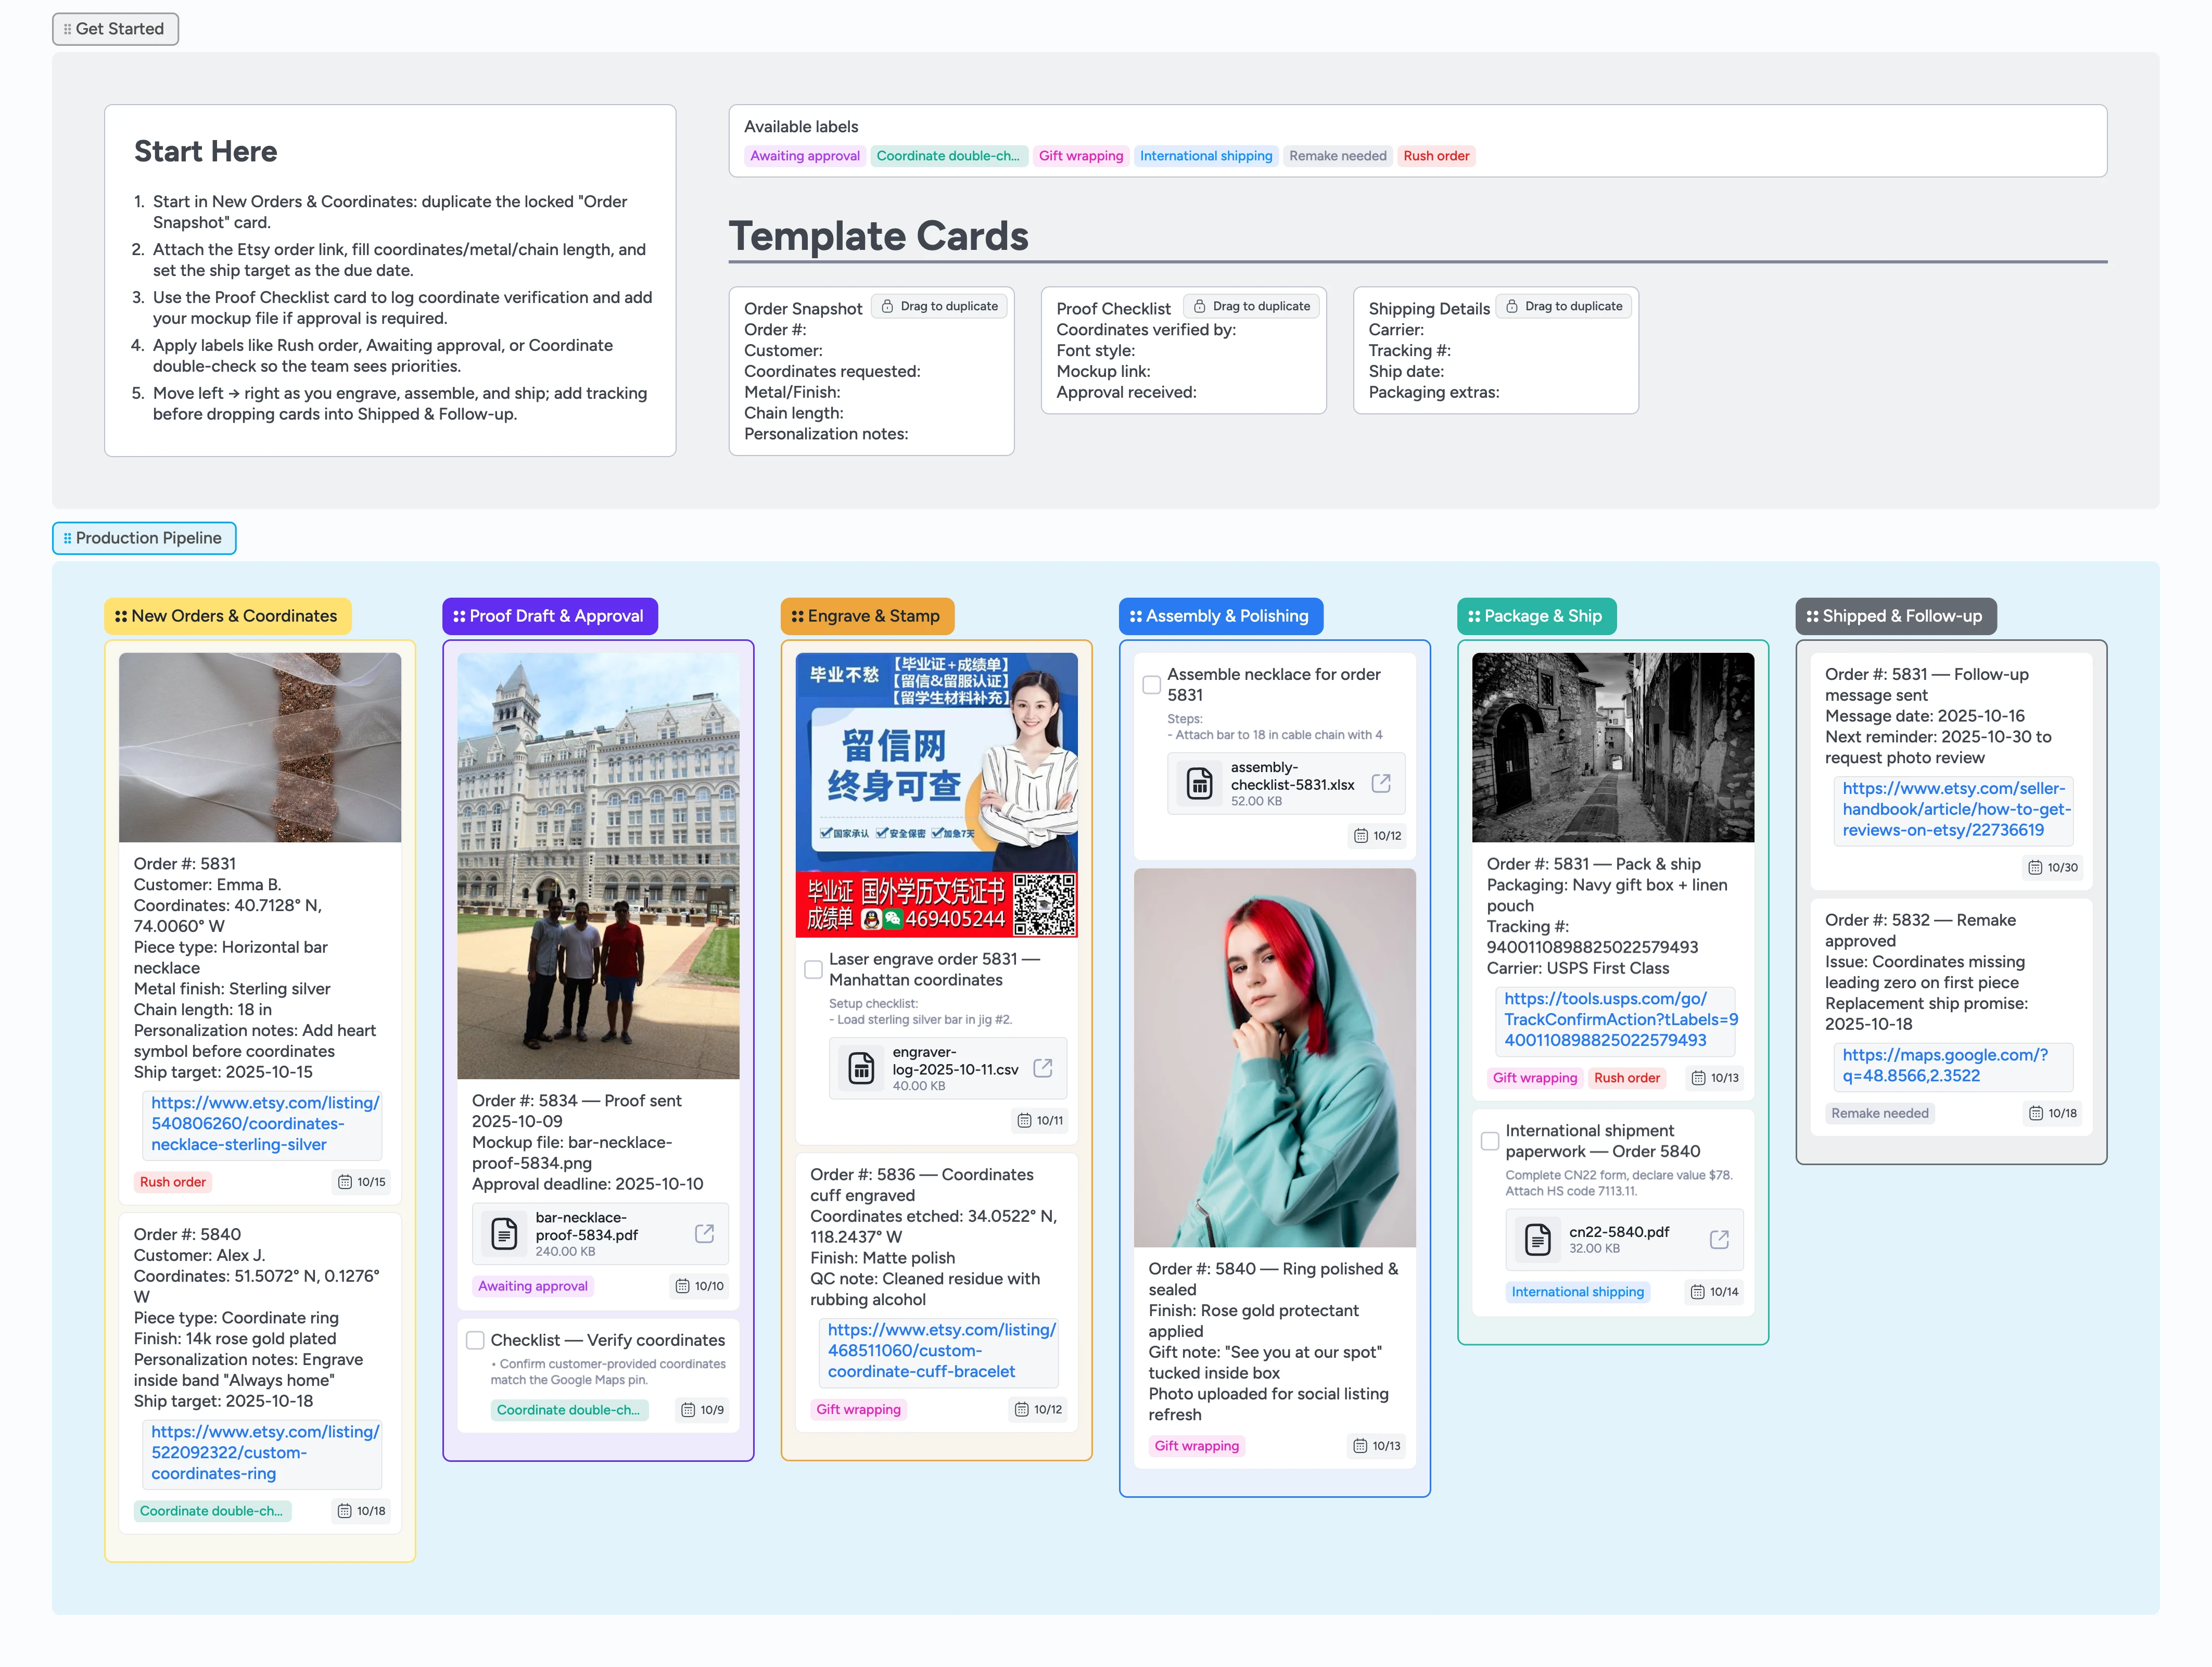
Coordinate jewelry buyers expect the exact latitude and longitude they shared to arrive on a polished piece, plus a quick update when it ships. Spreadsheets and inbox threads hide those details; this template turns your Etsy queue into a reliable workflow. Intake cards capture metal, chain length, requested symbols, and map links; proof reminders keep approvals on schedule; engraving tasks lock in machine settings; packaging cards store tracking numbers and gift wrap notes; follow-up cards prompt review requests or remakes. Your team always sees the same live board, so nothing falls through the cracks.
- Track every custom order from intake to follow-up
- Confirm coordinates and proofs before engraving
- Prevent missed deadlines and customs delays by tagging rush jobs and international shipments
- Collaborate live across makers and customer service
Log every order in New Orders & Coordinates
Start at the Start Here card in the Getting Started section, drag the locked Order Snapshot card into New Orders & Coordinates, and fill in the order number, customer, metal, chain length, and requested icon. Attach the Etsy listing link plus any map screenshot, set the ship target as the due date, and apply labels such as Rush order or Coordinate double-check. Add a quick note if you need a proof so your teammate knows what to prep. Once the details look right, leave the card in the first stage for production to grab.
Send proofs and confirm coordinates
Move cards that need artwork into Proof Draft & Approval, duplicate the Proof Checklist card, and log who verified the latitude and longitude. Attach the mockup image or PDF, plus the Google Maps link used to confirm the coordinates, then leave the Awaiting approval label on until the buyer replies. Use comments or @mentions on the card to confirm any format changes the customer requests.
Run engraving with the checklist
When you are ready to engrave, slide the order into Engrave & Stamp and duplicate the laser checklist card to record power, speed, passes, and inspection notes. Upload the engraver log or test photo so teammates can audit settings later. If you discover an error, switch the label to Remake needed and leave the card in this lane until the correction plan is set.
Assemble and polish before packaging
Drop the card into Assembly & Polishing after engraving, duplicate the assembly checklist card, and check off attaching chains, adding extenders, ultrasonic cleaning, and logging the final weight. Record gift wrap requests or ring sizing adjustments in the card description so the pack-and-ship step has full context. Mark Gift wrapping if the buyer ordered special packaging.
Ship fast and schedule follow-ups
Move the card into Package & Ship to record the box type, tracking number, and customs paperwork. Once the label is created, attach the USPS or courier tracking link and tag the teammate who owns fulfillment. After the parcel goes out, drop the card into Shipped & Follow-up, set a due date for the review reminder, and add a comment outlining any remake commitments so the whole team sees the promise in the timeline.
What’s inside
Start-Here intake guidance
Duplicate the Order Snapshot card to log coordinates, metal choices, and chain lengths without retyping.
Proof Draft & Approval lane
Optional stage for mockups with checklist cards to store map screenshots, buyer messages, and approval deadlines.
Engraving checklists
Task cards detail laser power, passes, and inspection steps so every bar, cuff, or ring is engraved the same way.
Assembly & polishing tasks
Document jump-ring assembly, ultrasonic cleaning, and extender requests before pieces move to packaging.
Shipping + follow-up cards
Capture tracking numbers, customs paperwork, and post-delivery review reminders in one spot.
Why this works
- Prevent coordinate mistakes by forcing verification before engraving
- Keep personalization details, files, and tracking links attached to each card
- Surface rush jobs, customs paperwork, and remakes with dedicated labels
- Shorten handoffs by keeping engraving, assembly, and shipping checklists visible
FAQ
How does the engraver know which orders are approved?
Cards move out of Proof Draft & Approval only after the Awaiting approval label is removed; engravers filter the Engrave & Stamp stage for cards without that label to pick up pieces that are ready.
How do I double-check coordinates before engraving?
Attach the map link or screenshot to the card using the Proof Checklist; the label Coordinate double-check stays on the card until a teammate confirms the latitude and longitude match the buyer’s request.
What if a buyer doesn’t need a proof?
Skip the Proof Draft & Approval stage—leave the card in New Orders & Coordinates until you’re ready to engrave, and remove the Awaiting approval label so production knows it’s ready.
How do I flag rush orders or remakes?
Apply the Rush order or Remake needed labels on the card, and the board keeps those tags visible across every stage so teammates can re-prioritize instantly.