Etsy Doormats Production Pipeline Template
Run Every Custom Doormat Like Clockwork
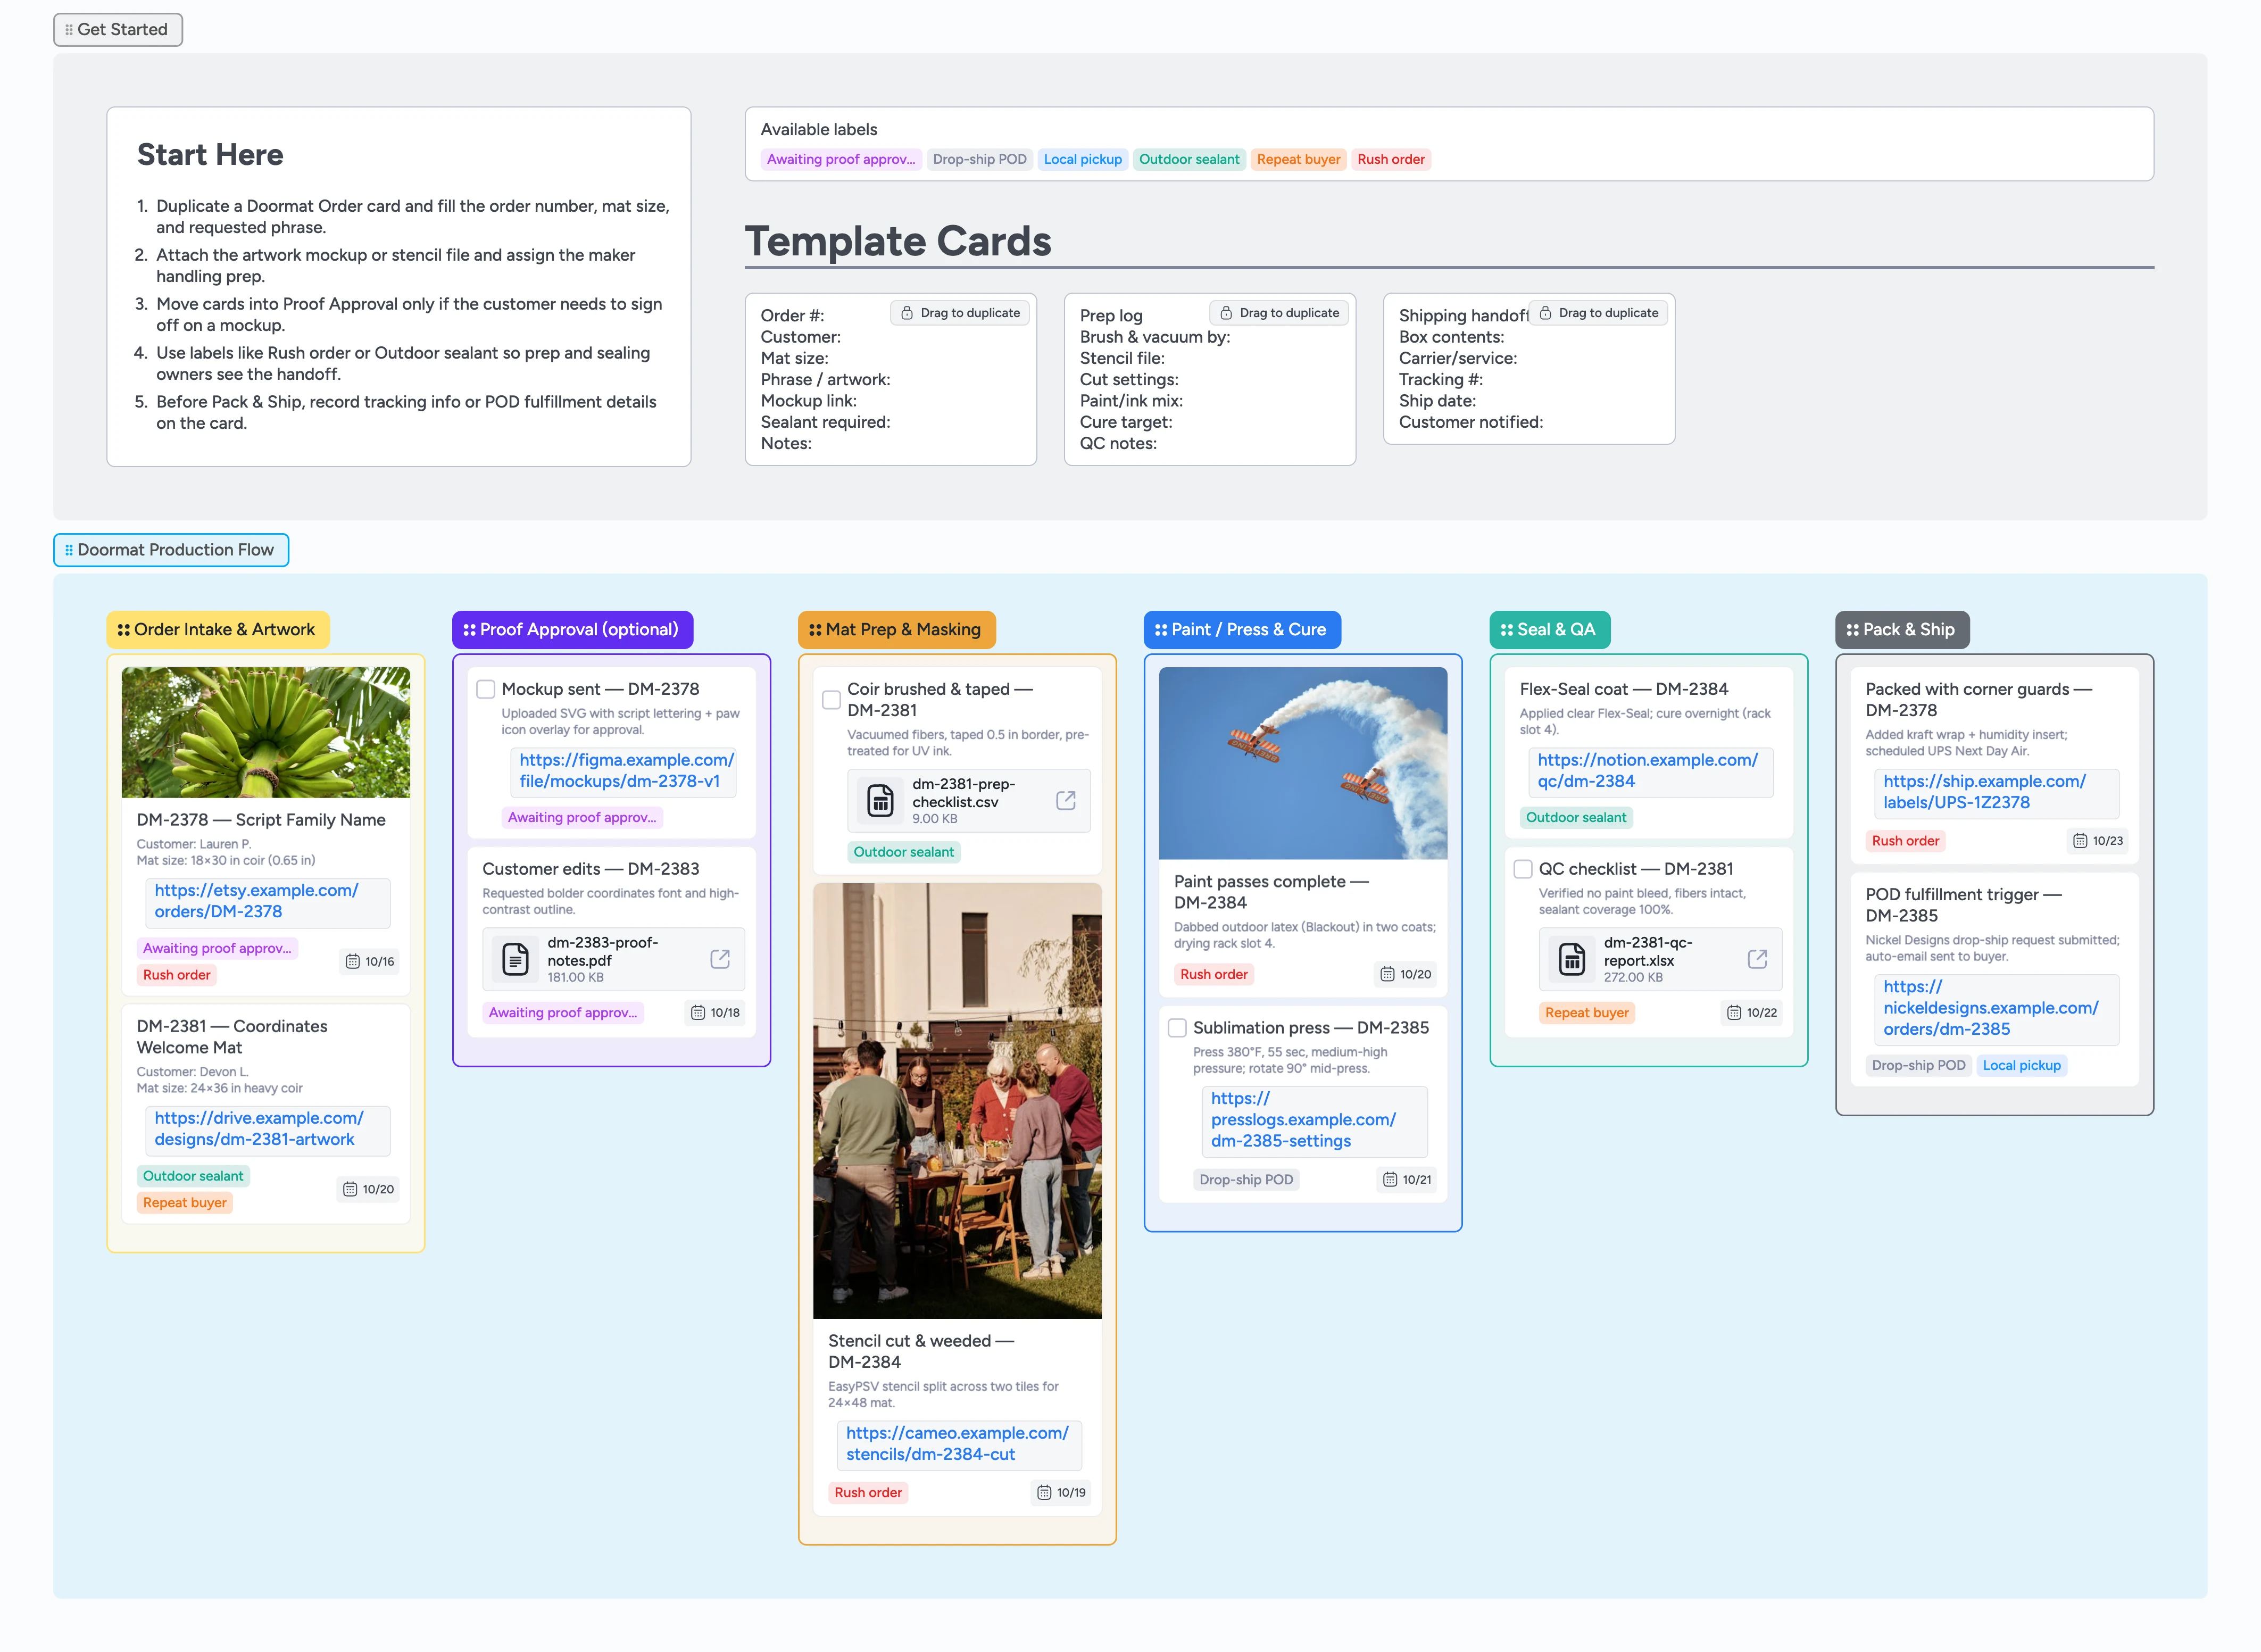
Custom doormat orders arrive with rush deadlines, mockup tweaks, and production quirks—so relying on email threads invites missed details. This Instaboard gives you one board where every attachment, approval, and deadline lives on the card: duplicate the Doormat Order card, assign the maker, and upload artwork or stencil files the moment a buyer checks out. Proof approvals, mat prep, heat-press settings, and sealant cures all move left to right so everyone knows what still needs a pass in the shop. Labels flag rush, sealant, or POD batches, while ready-made checklists make it simple to hand off packing or drop-ship triggers without rewriting instructions.
- Capture proofs, files, and due dates on one order card
- Signal rush, sealant, or POD jobs with labels your crew can filter
- Track prep, paint, and curing work across six color-coded stages so bottlenecks surface instantly
- Hand off packing with ready-to-duplicate shipping checklists
Spin up orders in Get Started
Open the Get Started section, duplicate the Doormat Order card, and fill the order number, mat size, requested phrase, and any sealant requirements. Assign the maker handling intake, set the due date promised on Etsy, and attach mockups or reference art so design never chases email threads. Drop in the Etsy order link plus any POD vendor info right on the card. Apply labels like Rush order or Outdoor sealant before the card leaves intake so later stages know to prioritize drying time or extra coats.
Pro tip: Already know this buyer loves reorders? Add the Repeat buyer label to filter future batches fast.
Run proofs without chasing email
Drag the card into Proof Approval when a mockup is ready. Duplicate the Prep log card if you need to track stencil sizing revisions, then paste the Figma or PDF link on the main order card. @mention your designer or customer success teammate to log who sent the proof and when. Keep the Awaiting proof approval label on until the buyer gives the green light, then clear it so production knows to move ahead without waiting.
Prep and imprint every mat intentionally
Move approved orders into Mat Prep & Masking, open the Prep log micro-template, and capture in the card description who brushed and taped the coir, the Cameo cut settings, and the paint or UV ink recipe. When the stencil hits the mat, drag the card into Paint / Press & Cure and add checklist items or comments calling out the next action. Log heat-press temps (380°F for sublimation, for example) or the number of paint passes right on that Prep log checklist, then toggle the checkbox on the Sublimation press task when the cure finishes. Attach coverage photos or link to press logs in the card's attachment pane so the next shift sees exactly what happened.
Seal, QA, and ship confidently
Drop cards into Seal & QA, open the QC checklist task, and check off each Flex-Seal coat while adding comments for paint bleed fixes or fiber integrity checks. Keep drying rack positions in the card description so the next maker grabs the right mat. When the mat cures, drag the card to Pack & Ship and duplicate the Shipping handoff card to capture box contents, tracking numbers, or local pickup notes. Attach UPS labels or Nickel Designs drop-ship confirmations, then @mention the team so customers get notified right away.
What’s inside
Start-here primer
A Start Here card plus template cards show exactly how to log order specs, prep notes, and shipment details.
Six-stage production lane
Order Intake, Proof Approval, Mat Prep & Masking, Paint / Press & Cure, Seal & QA, and Pack & Ship so you drag cards left to right and see every order's current step at a glance.
Reusable micro-templates
Drag-and-duplicate cards for order briefs, prep logs, and shipping handoffs so the team follows the same checklist every time.
Demo orders & labels
Sample cards you'll duplicate to assign makers, set due dates, and attach files for sealant cures, POD requests, and rush jobs.
Attachment-ready workflow
Each stage lets you drop SVG proofs, press logs, and tracking links straight onto the card so handoffs stay documented.
Why this works
- Keeps proofs, prep notes, and shipping details attached to each doormat order
- Surfaces rush, sealant, and POD variations with labels the team can filter
- Logs stencil, paint, and press data on each card so you can filter past orders and repeat exact settings
- Builds a visible queue from intake through delivery to prevent bottlenecks
FAQ
How do I track POD drop-ship orders versus in-house painting?
Tag drop-ship jobs with the Drop-ship POD label and note the vendor portal link in the Shipping handoff card so fulfillment sees the difference immediately.
Where do I document paint mixes or heat-press settings?
Use the Prep log micro-template inside Mat Prep & Masking to capture cut settings, paint ratios, and press temps; the card stays with the order as it moves forward.
What if a proof isn’t required for simple orders?
Skip the Proof Approval column—keep the card in Order Intake & Artwork, clear the Awaiting proof approval label, and drag it straight to Mat Prep & Masking when you’re ready.
Can I track sealant cure times for rush jobs?
Yes. Add the Rush order label, note the cure deadline in the card’s due date, and include a comment in Seal & QA when the mat is safe to pack.