Etsy Hoodie Production Pipeline Template
Run custom hoodie production without chaos
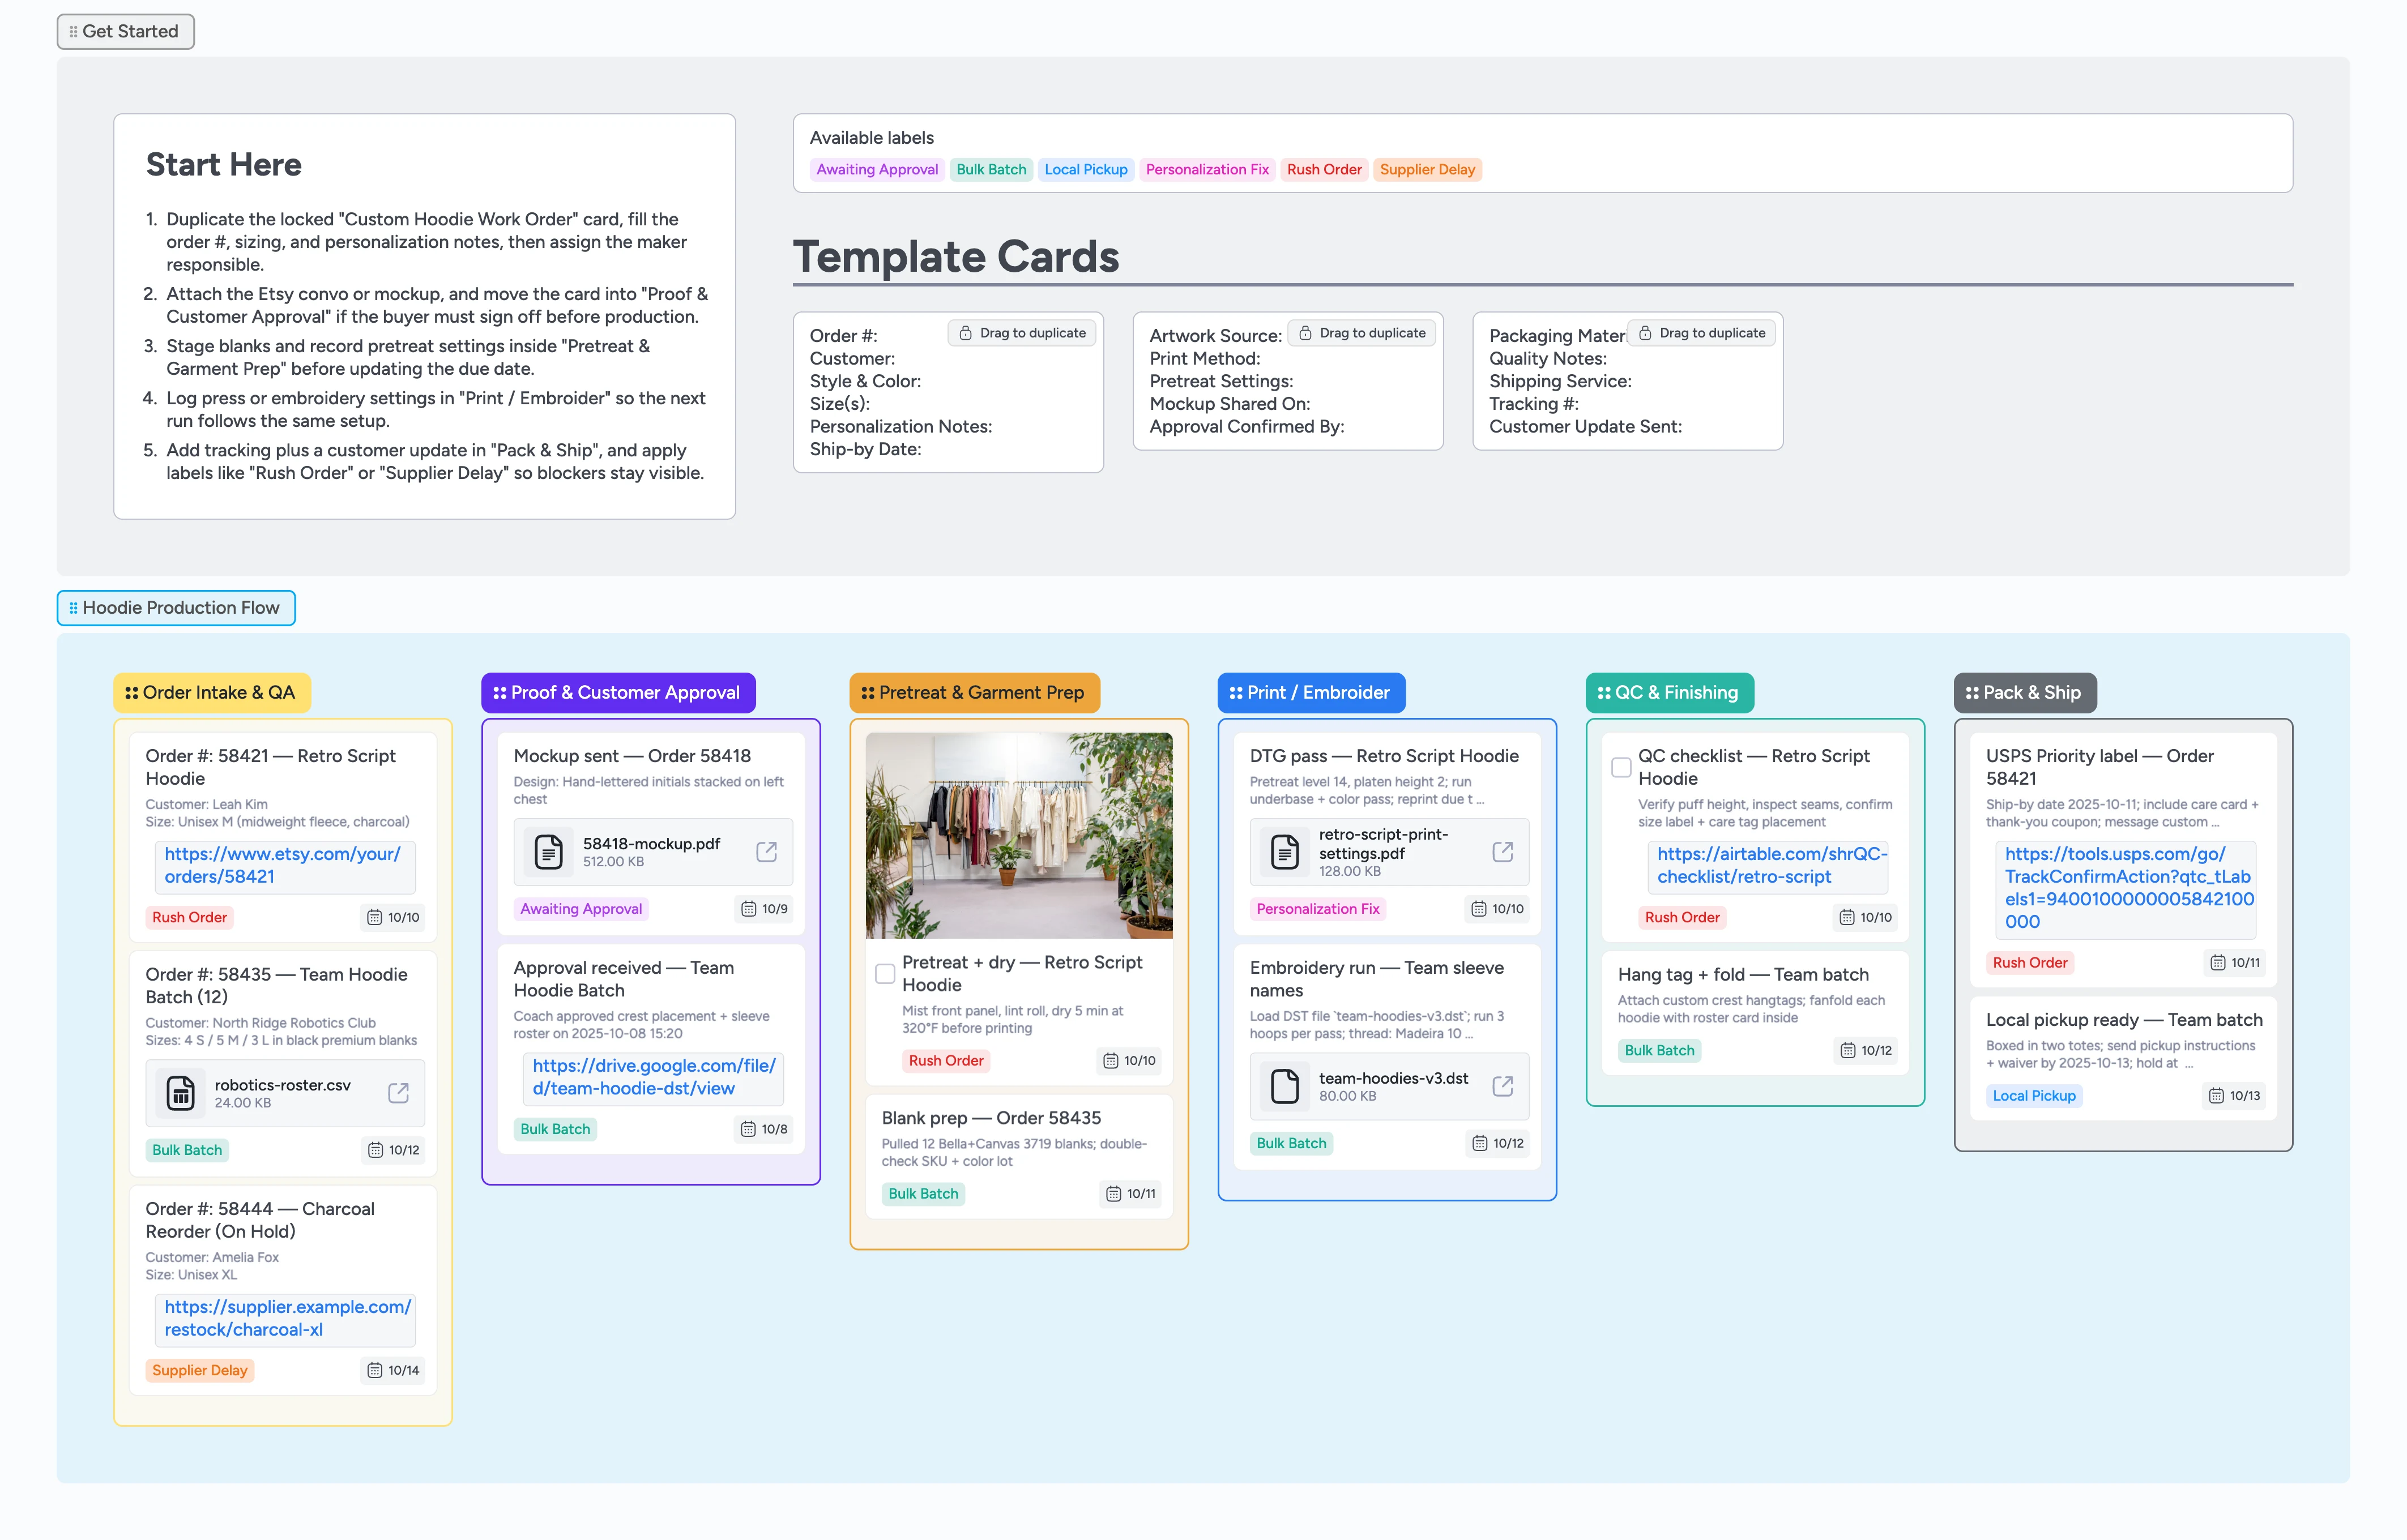
This Instaboard template gives made-to-order hoodie sellers a dependable playbook for handling Etsy orders, whether you print, embroider, or do both. Capture every personalization request, route cards through proof approvals, prep blanks with pretreat notes, and log the exact press or stitch settings so repeat jobs stay consistent. Labels flag rush orders, supplier delays, or local pickups instantly, while duplicate-locked starter cards keep data entry tight. Instead of juggling DMs, spreadsheets, and sticky notes, your team works in one left-to-right flow that mirrors how hoodies actually move through the shop.
- Track every hoodie order with duplicate-locked cards
- Capture approvals with labels and due dates
- Batch production using Bulk Batch grouping
- Ship on time via tracking attachments
Kick off in Order Intake & QA
Start in the Get Started section: duplicate the locked "Custom Hoodie Work Order" card, rename it with the Etsy order number, and fill in customer, sizing, and personalization lines right away. Assign the maker who owns first touch so the card shows a face. Paste the Etsy order URL into the description or as an attachment so you can jump back to messages in one click. Set the due date to match your promised turnaround, then drag the card into Order Intake & QA. Apply the Rush Order or Supplier Delay label when timing already looks tight.
Pro tip: Keep Order Intake & QA lean—only the next few days of work belong here so priorities stay obvious.
Collect approvals when needed
If a buyer must sign off, move the card into Proof & Customer Approval and attach the mockup PDF or JPG directly to the card. Drop a quick comment with "Proof sent"—Instaboard timestamps it automatically—and assign the teammate chasing approval. Flip on the Awaiting Approval label, set a follow-up due date, and filter that label whenever you need to see stalled cards in one click. When the customer greenlights, add an "Approved" comment, clear the label, and drag the card forward. Skipping proofs for the order? Leave the card in Intake and jump to prep instead.
Pro tip: Use card reminders or the calendar view to nudge yourself if a proof sits longer than 48 hours.
Prep blanks before production
Move cards into Pretreat & Garment Prep once blanks arrive, then add pretreat or hooping notes directly in the card so the production crew has context. Check the Bulk Batch label on orders that can run together and indent related cards underneath a batch captain. Attach supplier receipts or pretreat spec sheets—files stay on the card as it travels down the board. Update the due date when prep slips or when stock finally lands. Only slide the card to the next stage after blanks are lint-rolled, preheated, and staged on the correct rack.
Pro tip: Snap a photo of tricky placements and attach it so the press operator sees exactly what the buyer expects.
Run and log your production passes
Drag ready cards into Print / Embroider and fill in the production checklist: temperature, time, platen, thread color, hoop tension. Attach the RIP settings file or DST stitch file so reprints match later, and pin a reference card if this combo repeats often. Use the Personalization Fix label when you need a re-do, and note the reason in the card so the next pass avoids it. Assign whoever is running the machine for the day and keep due dates live to reflect real completion targets. Once the print or stitch is dialed in, move the card forward to QC & Finishing.
Pro tip: If you repeat a combo often, pin that card as a reference template and duplicate from it for future runs.
QC, pack, and close the loop
Inside QC & Finishing, tick through the task card: confirm puff height or stitch quality, lint-roll the garment, and check size tags. Note any extras—hangtags, care cards, freebies—in the description so packers know what to include. When the hoodie passes inspection, drag the card to Pack & Ship, add the carrier and tracking number, and attach a packing photo for fragile or high-value orders. Use Local Pickup to flag orders that stay on-site and Rush Order when the label must go out today. Finish by copying tracking into Etsy messages while the card stays as your single source of truth, then archive the order once the package is delivered.
Pro tip: Filter the board by label each morning—Rush Order and Supplier Delay should be empty by end of day.
What’s inside
Order Intake & QA
Kick off each order with a duplicate-locked card that captures sizing, personalization, ship-by dates, assignees, and label filters in one place.
Proof approval lane
Optional list to attach mockups, log approval comments with timestamps, and surface stalled cards by filtering the Awaiting Approval label.
Pretreat checklist
Stage blanks, log pretreat levels inside the card notes, and batch jobs with the Bulk Batch label before you hit print.
Production settings log
Store press temps, embroidery files, and rerun notes directly on the card so settings travel with the job.
QC and shipping wrap-up
Task cards and packaging prompts ensure tracking numbers, extras, and care cards never get missed as cards move to Pack & Ship.
Why this works
- Surfaces rush orders and stock delays through fast label filtering
- Locks repeatable hoodie settings into pinned cards so reprints stay consistent
- Keeps approvals, mockups, and tracking links attached to the moving card
- Gives every teammate a clear next action by combining sections, lists, and labels
FAQ
Does this work for both DTG and embroidery?
Yes. Tag DTG runs with Bulk Batch and log pretreat settings in the notes, while embroidery cards hold the DST file attachment and Personalization Fix label if you need a redo.
How do I handle local pickups?
Apply the Local Pickup label, add pickup instructions in the card, and leave it in Pack & Ship until the customer collects it so nothing gets lost.
Can I track supplier delays?
Tag the card with Supplier Delay, drop the ETA in a dated comment, and keep it in Order Intake & QA until blanks arrive so the label filter shows open shortages.
What if a personalization needs a fix?
Move the card back to Print / Embroider, flip on the Personalization Fix label, and log what changed so the team understands the redo before starting.