MSP Client Onboarding Checklist Template
Turn MSP onboarding into a repeatable flow
This checklist template helps MSPs move new clients from intake to a secure, monitored state. Duplicate the Client card, request access, deploy agents, establish your security baseline, and set a review cadence—without juggling spreadsheets and emails.
- Standardize client onboarding across discovery, rollout, and go‑live
- Track access requests, installs, and security checks in one place
- Spot blockers instantly by filtering Waiting on client or Security labels
- Reuse micro‑templates for every new client
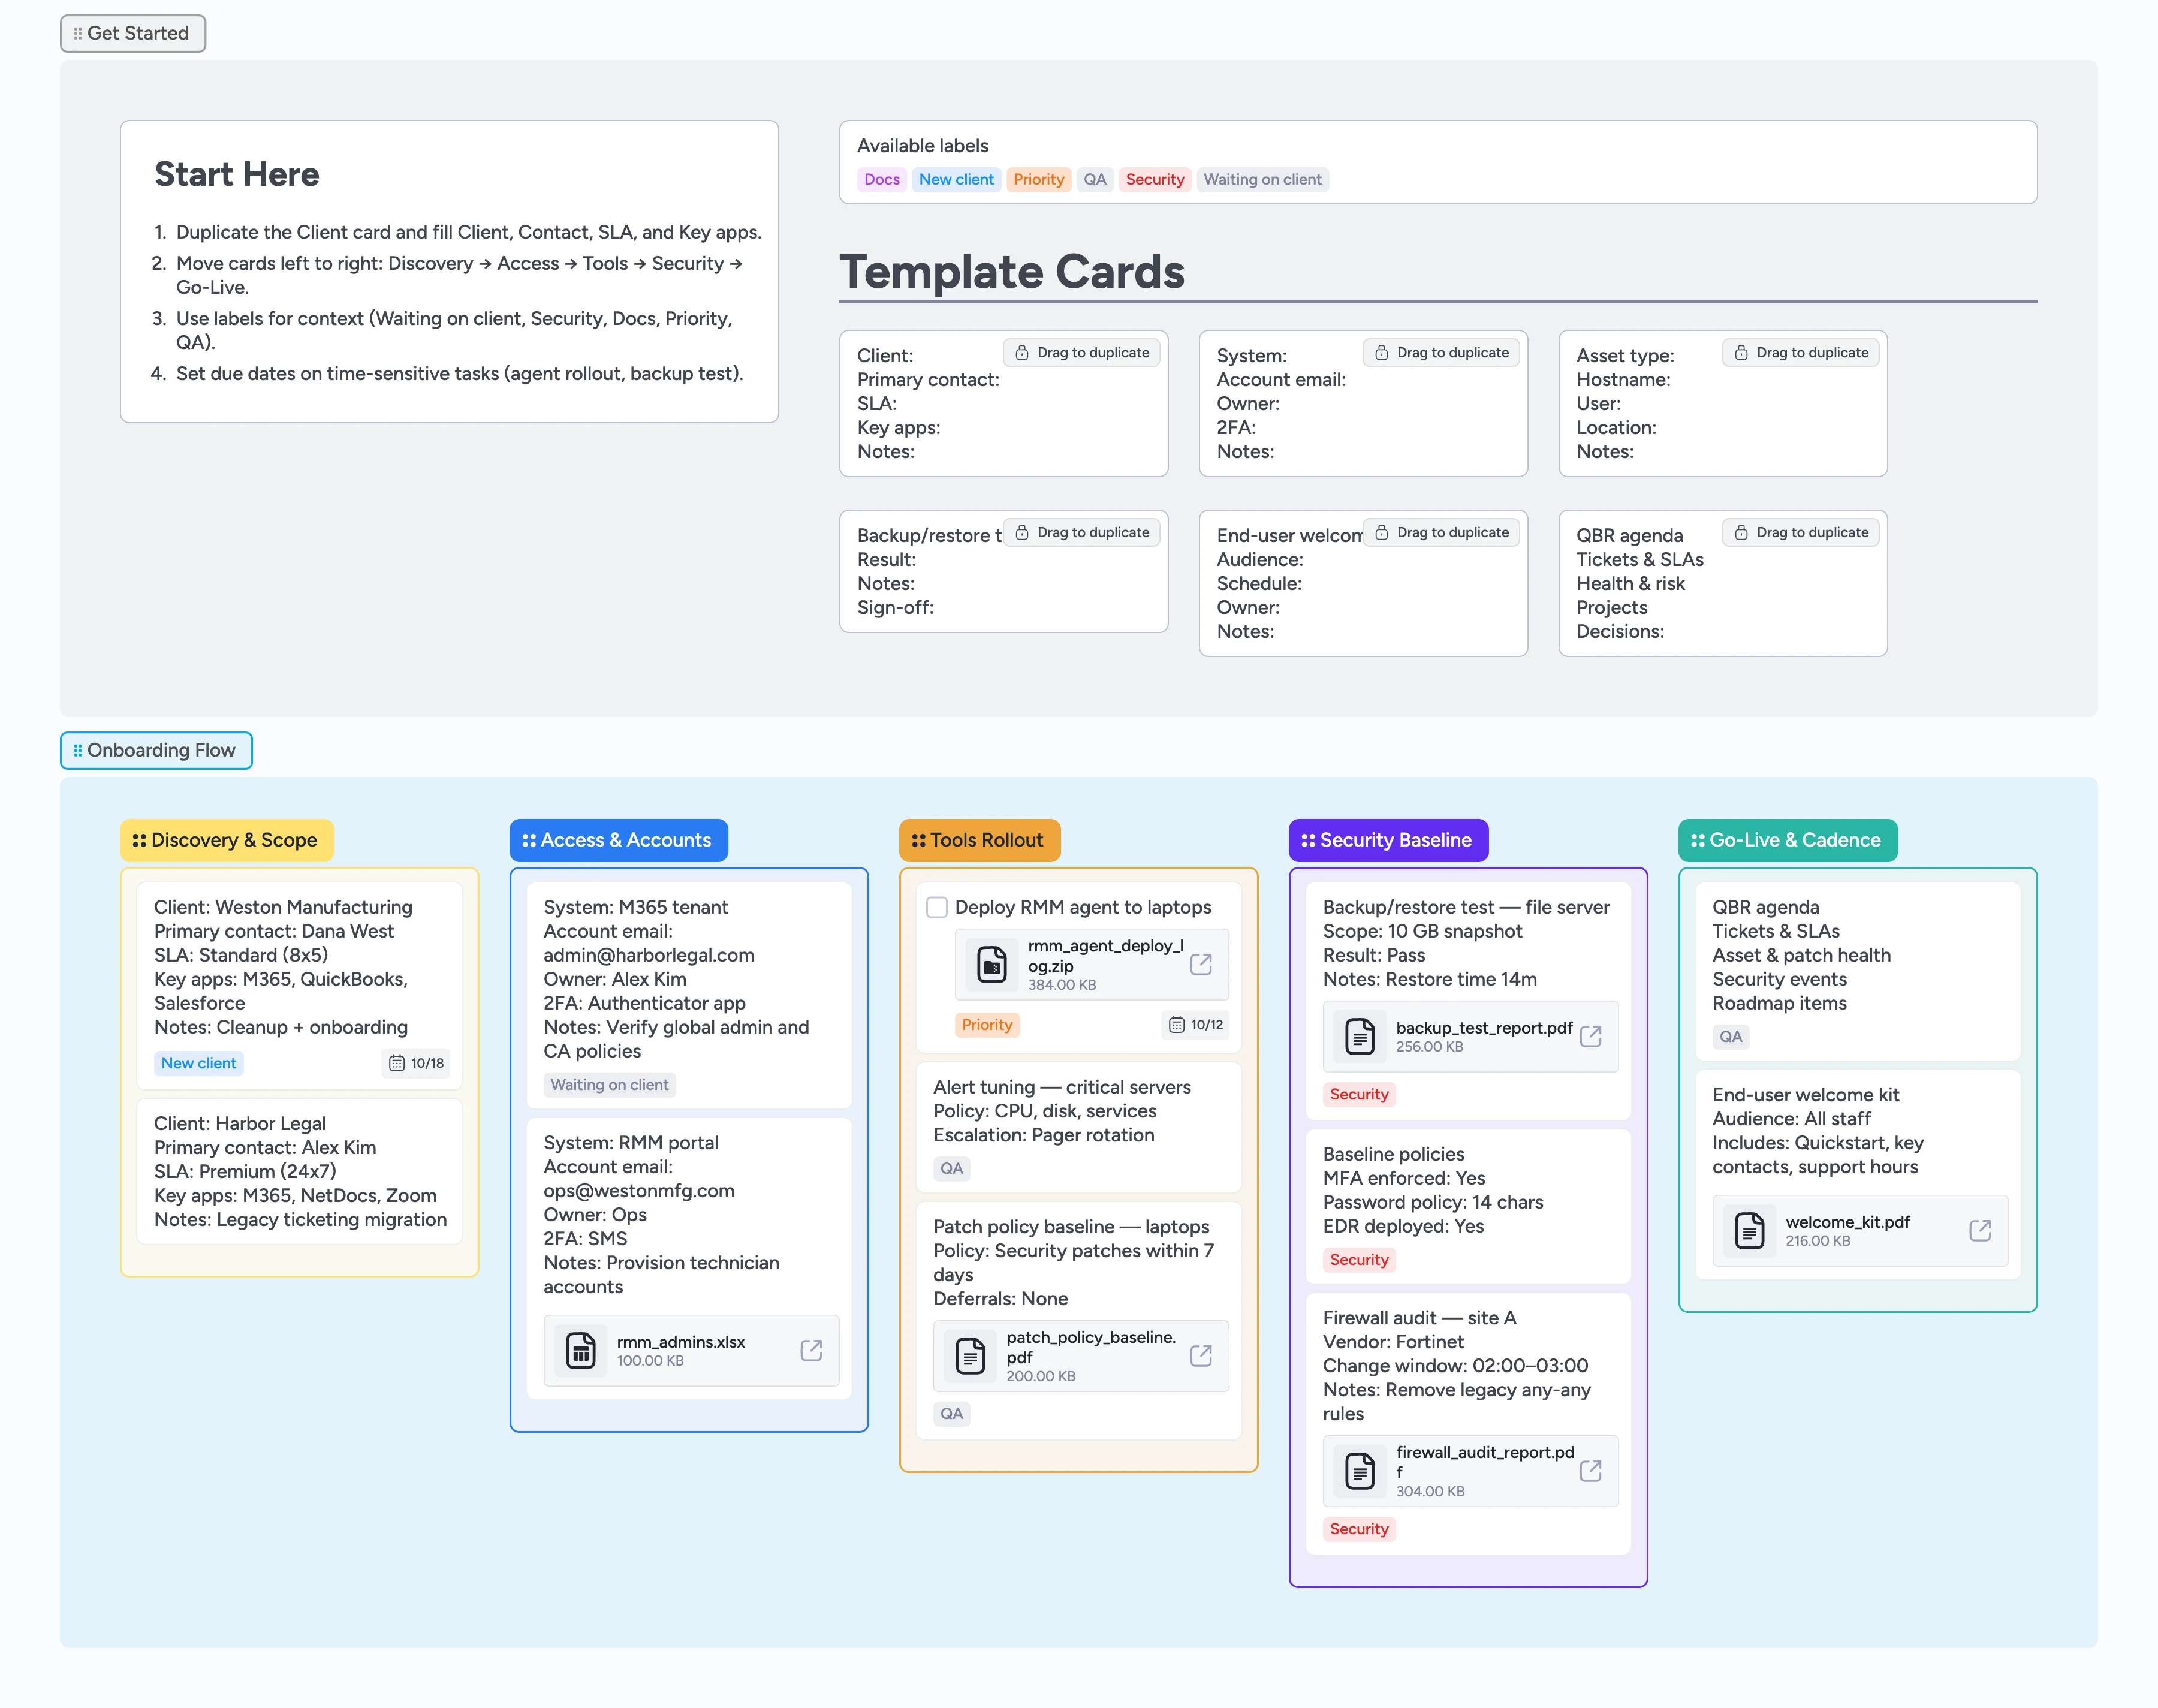
Start here: duplicate Client
You’re in the right template to onboard a managed IT client. Begin in Get Started: drag the duplicate‑locked Client card into Discovery & Scope, then fill Client, Primary contact, SLA, and Key apps line by line. Assign the account owner and set the first close or go‑live due date; add the New client label if this is a new relationship.
Map scope and milestones
On the Client card, set a due date for go‑live or the first QBR, then apply New client (add Priority if within 7 days). Use the Notes line to jot milestone dates so they’re visible on the card.
Request access and accounts
Open Access & Accounts. Duplicate one System Access card per system (M365, RMM, AV/EDR, backups, firewalls). Record account email, owner, and 2FA method, assign the teammate who will chase it, set a follow‑up due date, and apply Waiting on client as needed.
Roll out tools and policies
In Tools Rollout, duplicate the Asset card for each endpoint, attach the agent deploy log to the deployment card, and set due dates. Apply QA on Alert tuning, then move verified items right.
Establish the security baseline
In Security Baseline, duplicate Backup Test, assign an owner and due date, run the restore, then attach the report PDF and set Result on the card. Tag Security on any policies needing review.
Go‑live and set cadence
In Go‑Live & Cadence, duplicate the QBR Agenda card and schedule the first review. Add an End‑User Welcome/Training card if applicable. Clear Waiting on client as items complete and move finished cards right.
What’s inside
5 onboarding stages
Discovery & Scope, Access & Accounts, Tools Rollout, Security Baseline, Go‑Live & Cadence.
Duplicate‑locked micro‑templates
Client, System Access, Asset, Backup Test, End‑User Welcome, QBR Agenda.
Practical labels
New client, Waiting on client, Security, Docs, Priority, QA.
Demo items with file badges
Sample cards include realistic attachments (e.g., backup_test_report.pdf).
Why this works
- Prevents missed steps across access, rollout, and security baseline
- Attaches evidence (tests, policies) to the right cards
- Surfaces ‘Waiting on client’ and security issues instantly
- Sets a QBR cadence so the relationship starts with rhythm
FAQ
Which tools does this work with?
The template is tool‑agnostic. Use it alongside your preferred RMM/PSA/document system; attach links or files on the matching cards for context.
Where should we store source documents?
Keep files in your DMS or portal. Attach important PDFs (e.g., backup test reports) to the related card so status stays visible on the board.
How do we adapt this to our practice?
Edit the field labels on the duplicate‑locked micro‑templates, add or remove labels, and reorder lists to match your onboarding playbook.