User Interview Recruiting Pipeline Template
See every participant from sourcing to session
If you're juggling dozens of potential participants across spreadsheets, email threads, and calendar links, this template turns that mess into a single user interview recruiting pipeline. Track every participant from sourcing through scheduling and completed sessions, with clear owners, due dates, and labels for your key personas. Duplicate micro-templates for Participant cards, outreach messages, and session plans so your team can recruit faster, keep incentives organized, and always know who to talk to next.
- See your entire user interview funnel on one board from first touch to completed session
- Assign owners, set due dates, and keep every participant moving with clear next actions
- Attach screeners, consent forms, and calendar invites directly to participant cards
- Use reusable Participant, Outreach Message, and Session Plan micro-templates so recruiting stays consistent
- Quickly rebalance your study mix with labels like Persona A, Persona B, and Longtime customer
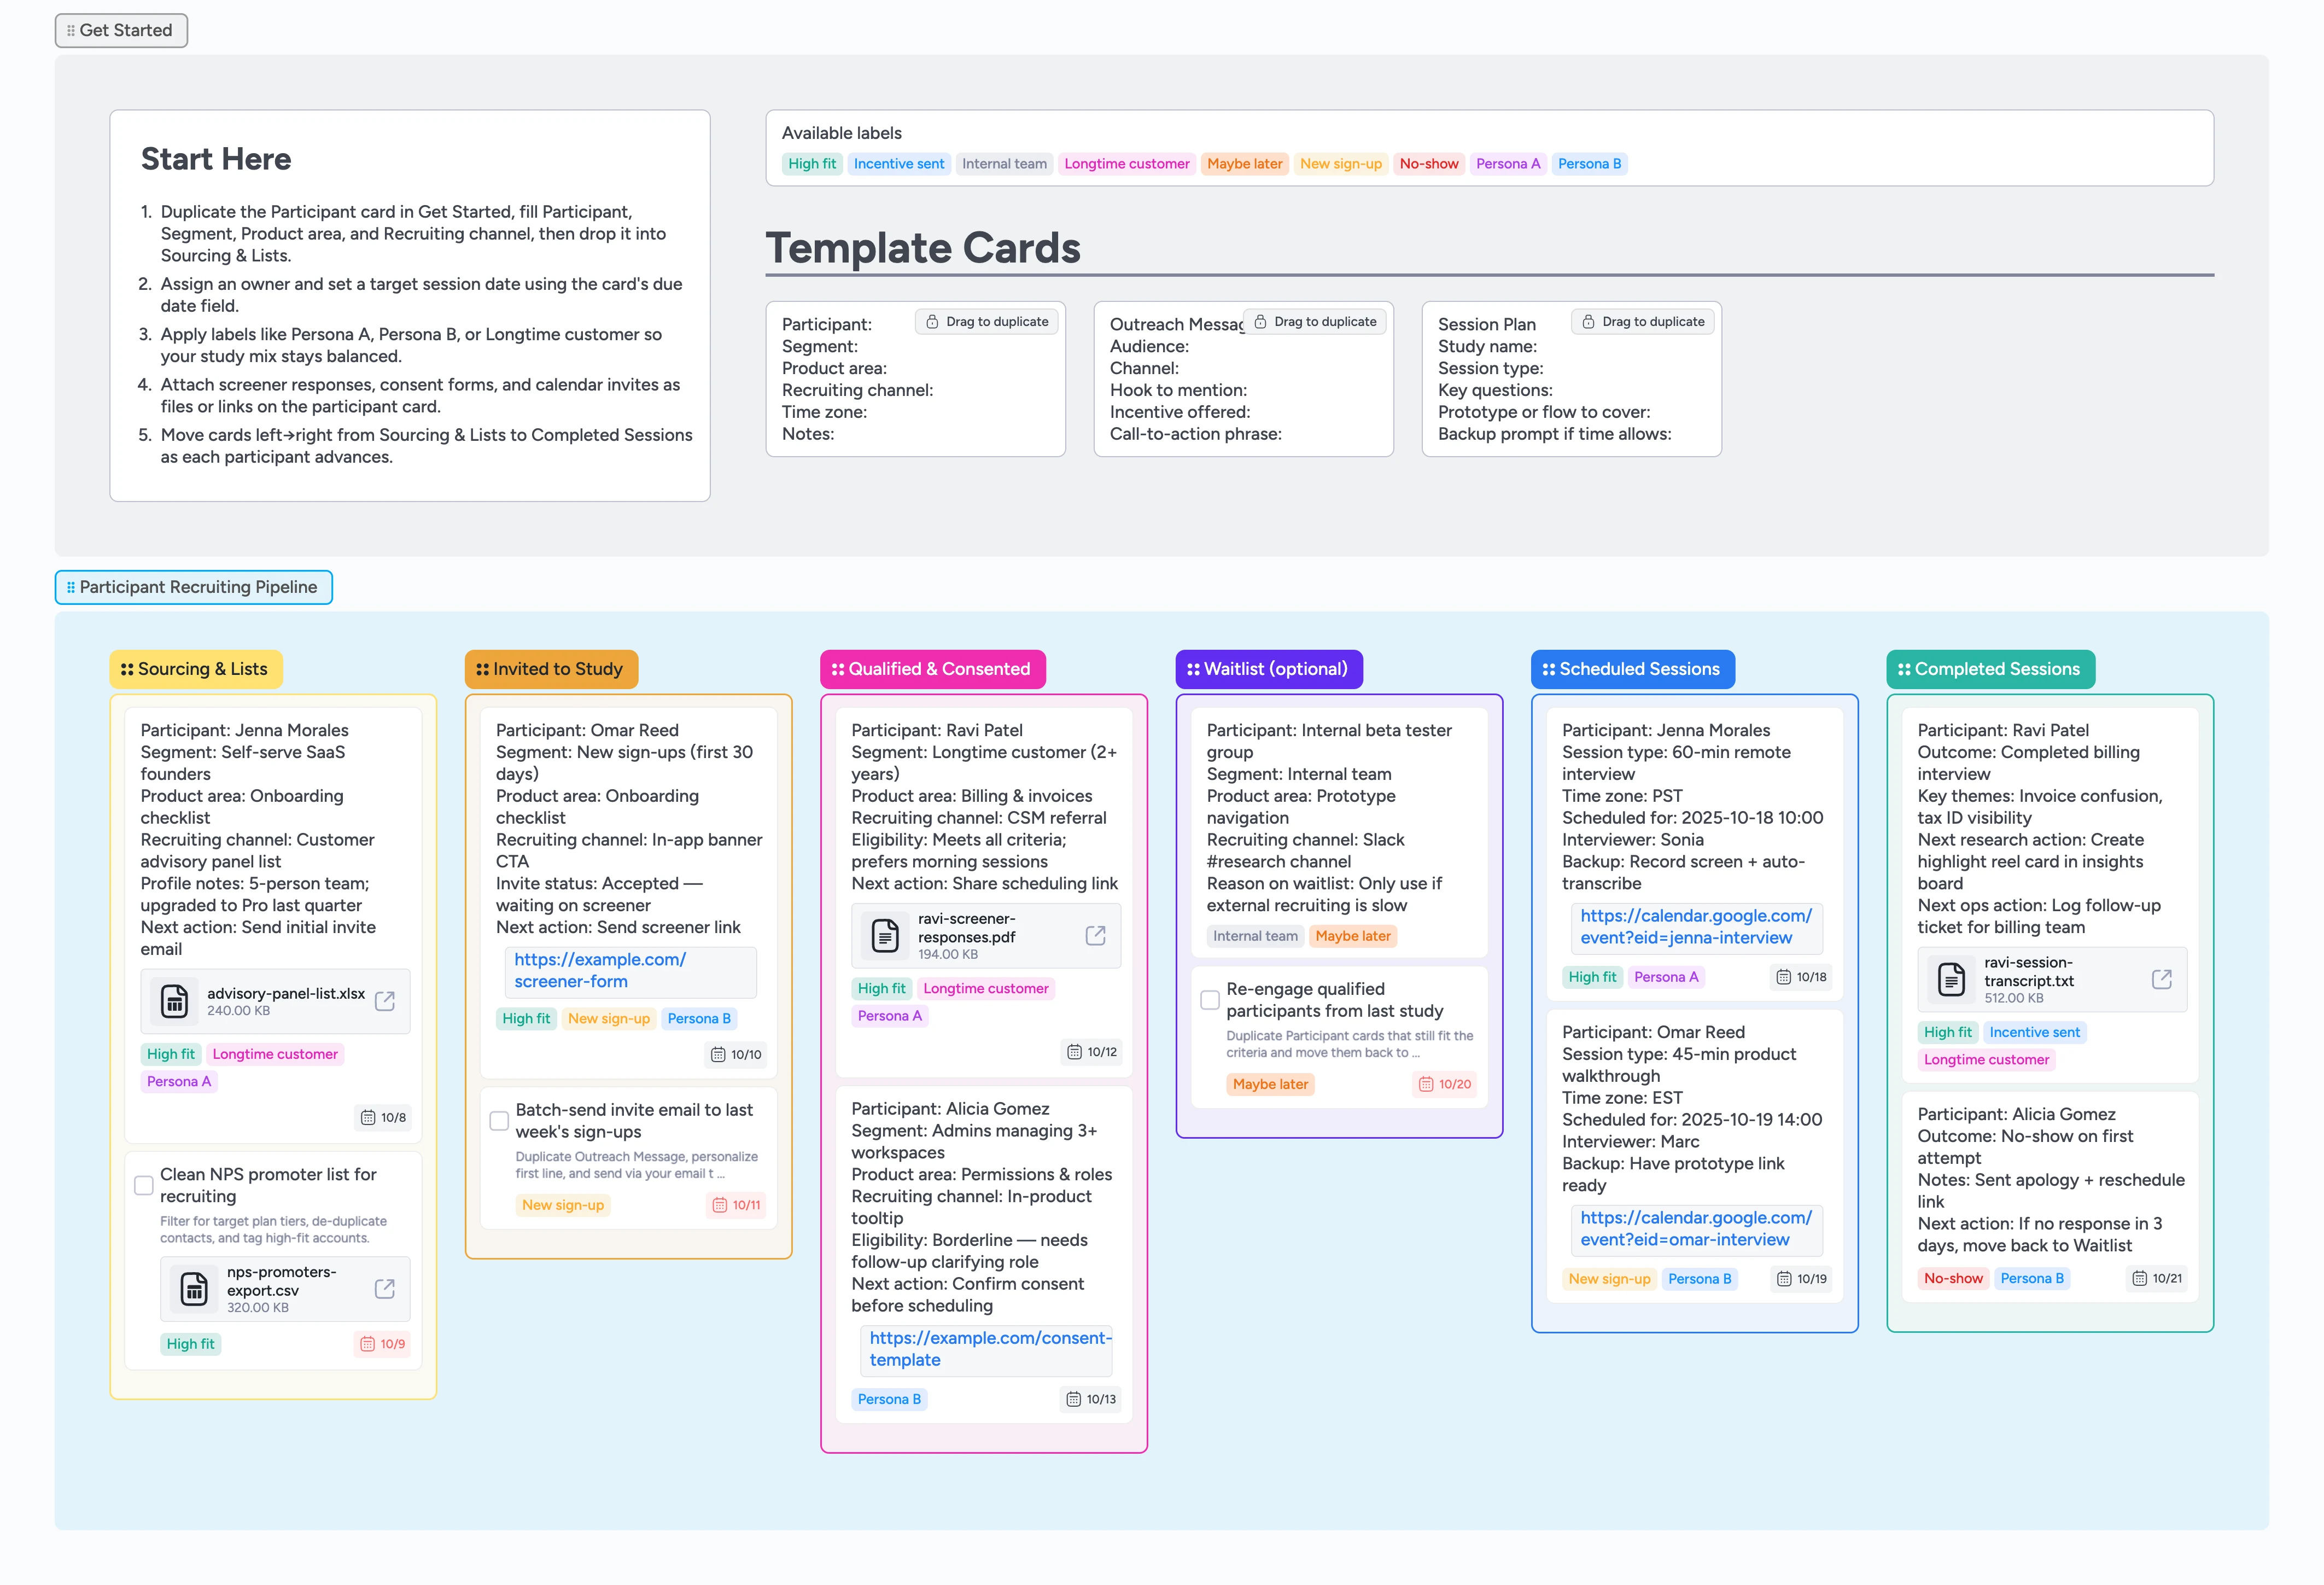
Start in Get Started → Participant.
On the board, go to the Get Started section and drag to duplicate the Participant card. Fill in the Participant, Segment, Product area, Recruiting channel, and Time zone lines for your first recruit, then drop the card into the Sourcing & Lists column to begin their journey.
Qualify with screeners and consent.
As replies come in from your screener form, email, or panel tool, move participant cards into Invited to Study and then Qualified & Consented when they meet your criteria. Attach screener responses or consent PDFs to the card, set a due date for the next action, and apply labels like Persona A, Persona B, Longtime customer, or New sign-up so your sample stays balanced at a glance.
Schedule sessions directly from the board.
When someone is ready to meet, move their card into Scheduled Sessions and set the due date to the session time. After you send the invite in your calendar tool, paste the calendar event link or video call URL into the card, assign the interviewer, and use the Session Plan micro-template so your key questions and flows are always one click away during the call.
Run interviews and log outcomes.
After each conversation, drag the card into Completed Sessions and add key themes or follow-ups in the card description. Attach transcripts or recordings as files or links so anyone opening the card later can see context instantly, tag High fit or Maybe later, and optionally link the card into a separate insights board so research synthesis stays connected to recruiting.
Manage your waitlist and follow-ups.
Use the Waitlist (optional) column for internal testers, over-recruited participants, or people who asked to talk later. Move cards there, keep the Maybe later or Internal team labels applied, and set a new due date when you plan to reach out again so waitlisted participants never become forgotten spreadsheet rows.
What’s inside
Six clear recruiting stages
Sourcing & Lists → Invited to Study → Qualified & Consented → Waitlist (optional) → Scheduled Sessions → Completed Sessions, so you always know where each participant stands.
Participant micro-templates
Reusable cards for Participant, Outreach Message, and Session Plan help you standardize what you capture about each recruit, every invite, and every session.
Labels for balanced samples
Labels like Persona A, Persona B, Longtime customer, New sign-up, Internal team, High fit, Maybe later, and No-show make it easy to see if your study mix is on track.
Demo recruiting examples
Filled cards show realistic recruiting flows – sourcing from NPS promoters, inviting new sign-ups, qualifying and consenting, scheduling sessions, and tracking incentives after interviews.
Ready-to-export boards
A clean scaffold plus a filled example variant make it easy to spin up a fresh recruiting board for every new study while keeping your structure consistent.
Why this works
- Turns scattered recruiting tools into one participant pipeline
- Keeps owners, due dates, and labels visible on every card
- Connects screeners, consent, and scheduling links to the right participant
- Supports repeatable studies with reusable micro-templates
- Prevents over-recruiting by tracking qualified participants and waitlists separately
FAQ
Can I change the stages or add more lists?
Yes. After loading the template you can rename lists, add or remove stages, or tweak colors to match how your team runs research recruiting while keeping the overall layout tidy.
How does this work with our existing recruiting tools?
Use this board as the command center. Keep your screener forms, scheduling tools, and panel providers, but attach links or files to each participant card so the status and next action are easy to see in one place.
How should we track incentives?
Record incentive details on the participant card and use labels like Longtime customer, New sign-up, or High fit to mark priority participants. When you send a gift card or payment, add a note or tag so everyone can see who has been rewarded.
Can we reuse this for multiple studies?
Yes. Duplicate the entire board for each new project or clear cards between studies. The pipeline, micro-templates, and labels stay in place so your team never starts from scratch.