Agency Onboarding Questionnaire Template
Turn answers into a scoped proposal
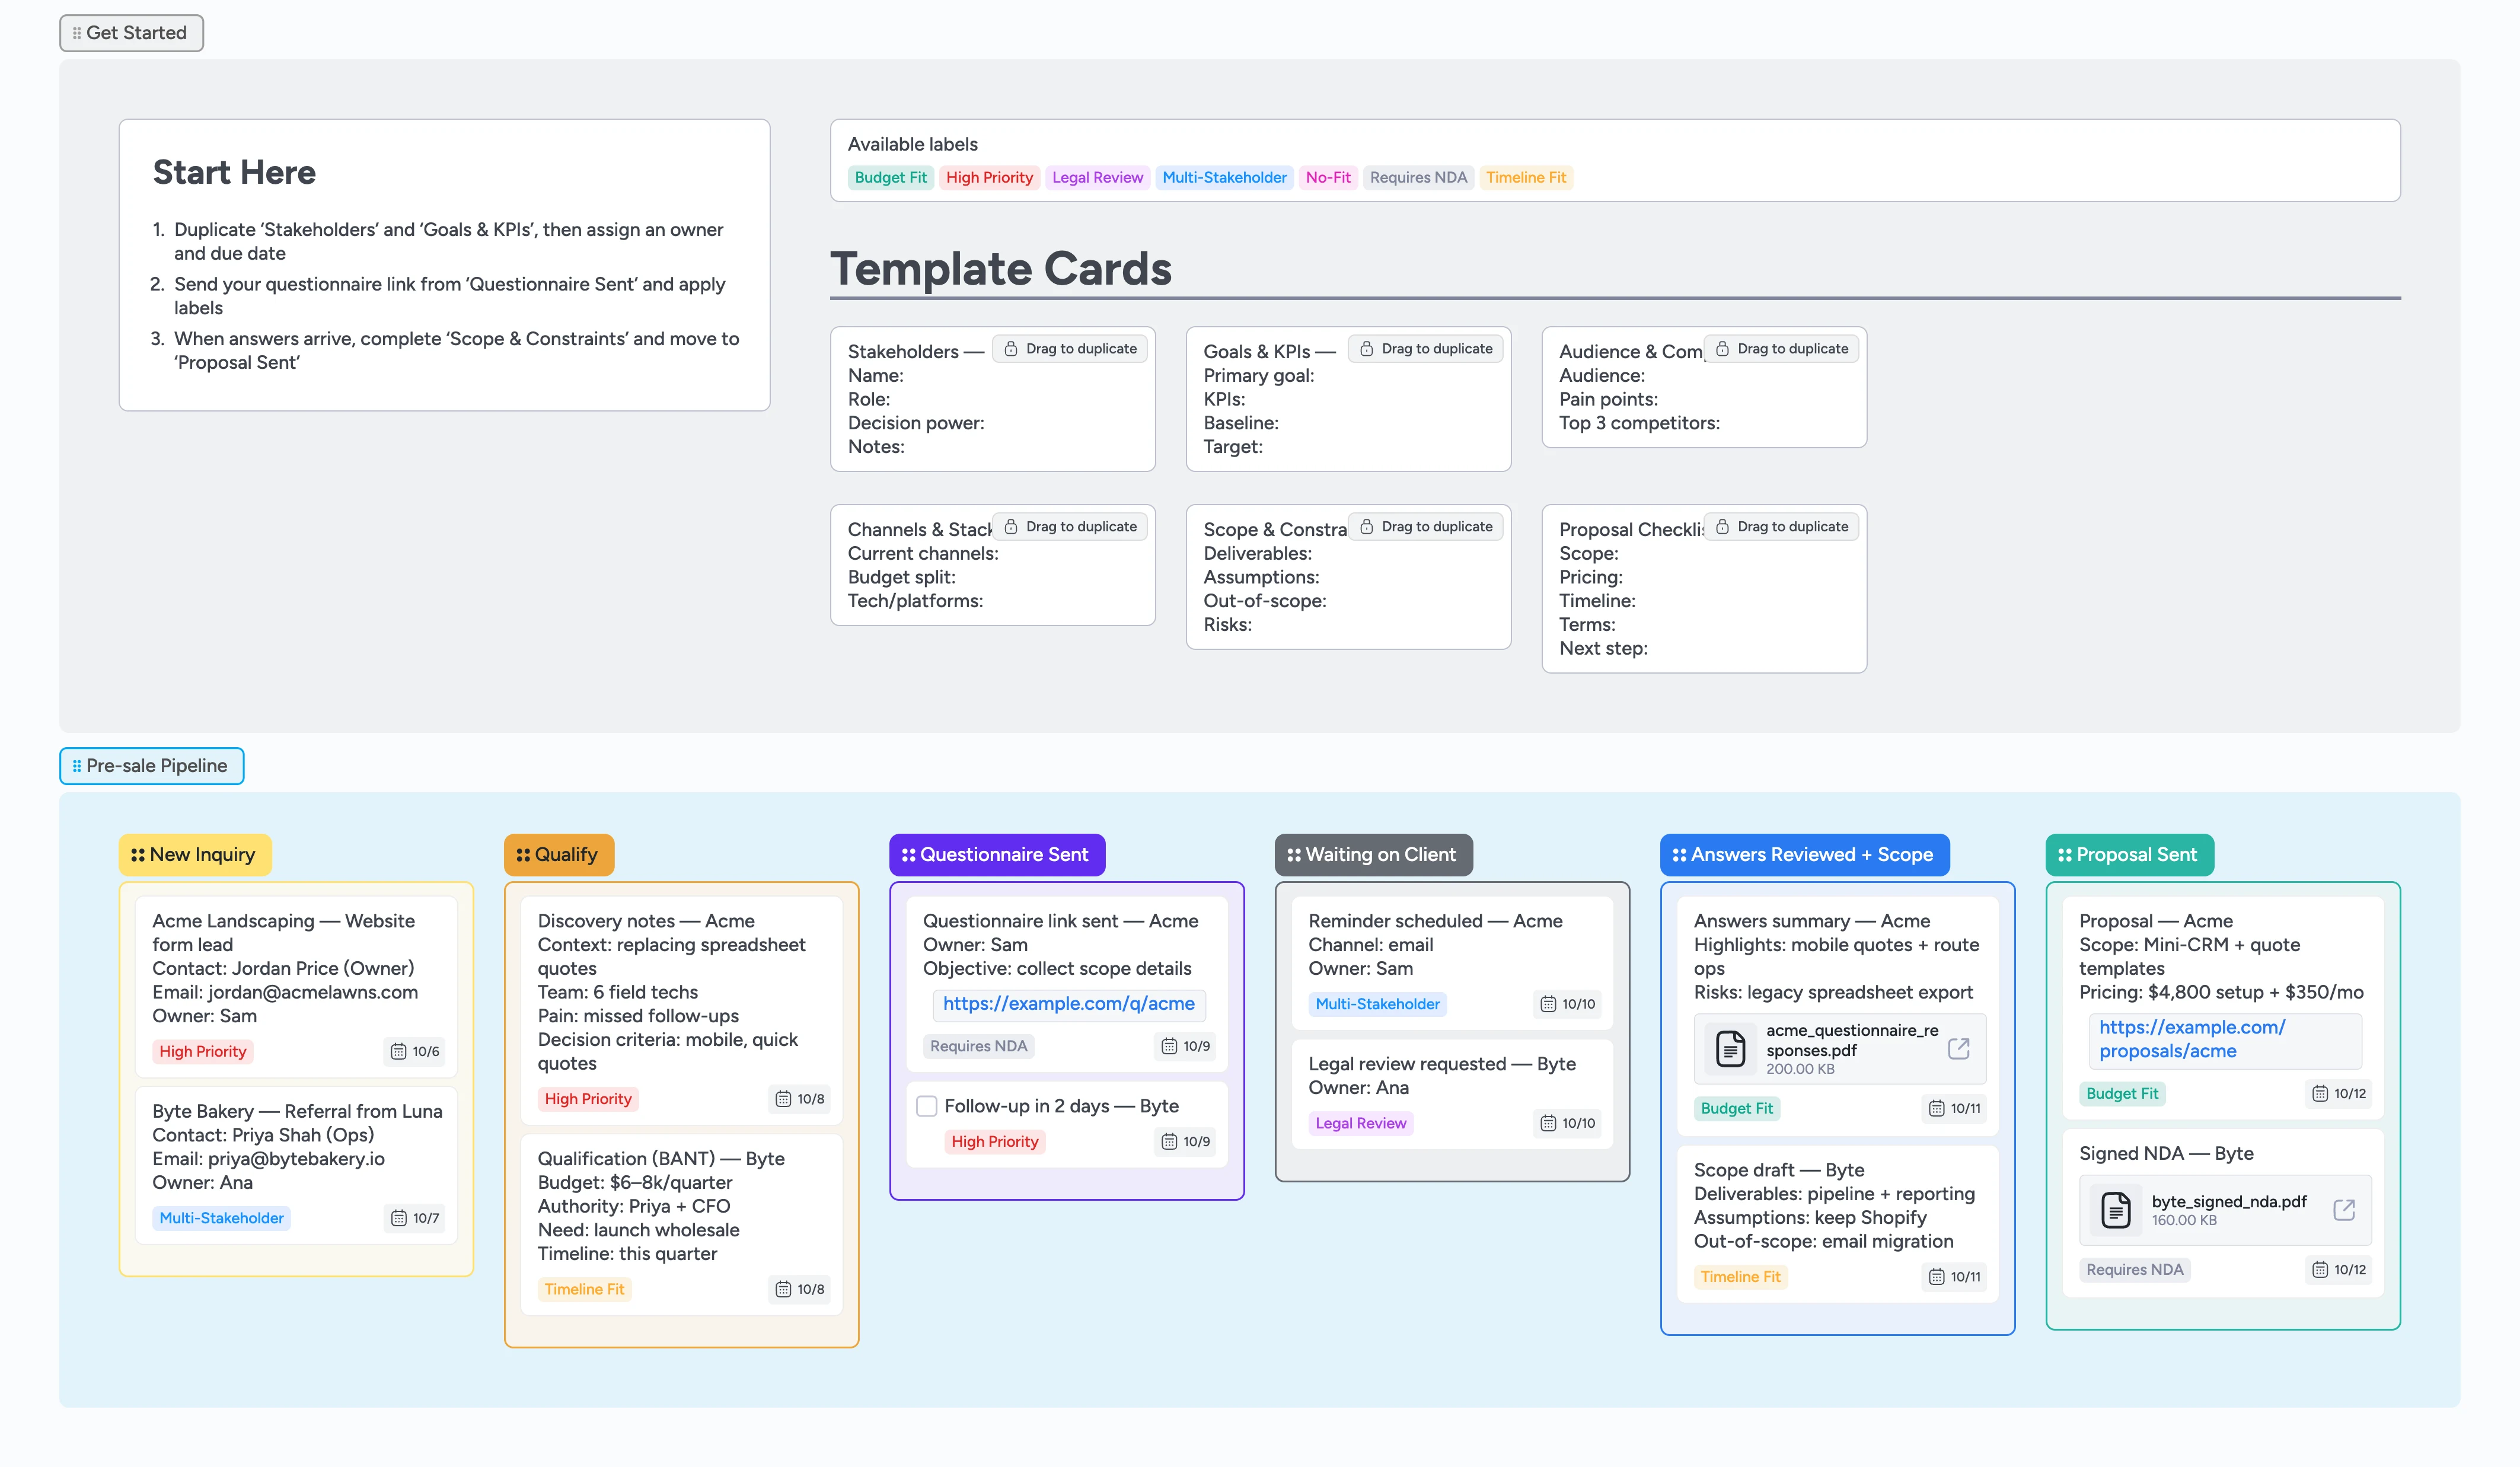
This template helps agencies qualify leads fast, send a clean onboarding questionnaire, and translate responses into a clear scope you can price and send. Start in Get Started, duplicate the right micro‑templates, and track each lead across a left→right pipeline: New Inquiry → Qualify → Questionnaire Sent → Waiting on Client → Answers Reviewed + Scope → Proposal Sent. Labels make priority and constraints obvious while assignees and due dates keep follow‑ups on schedule.
- Send a questionnaire without leaving your board
- Capture stakeholders and context with reusable cards
- Review answers and draft scope in one place
- Move leads left→right to show progress
- Tag priority, timeline fit, and legal needs
Start in Get Started
Open the Get Started section. Duplicate the ‘Stakeholders’ and ‘Goals & KPIs’ micro‑templates, then assign an owner and due date. Apply a label like High Priority or Requires NDA if known. Keep descriptions empty — fill fields in the title so the card stays scannable.
Pro tip: Use one card per lead artifact (stakeholders, KPIs, scope).
Send your questionnaire
Drag the lead card to ‘Questionnaire Sent’. Attach your form link on a short ‘Questionnaire link sent’ card and tag the lead. Add a follow‑up task with a due date so you don’t wait indefinitely. If legal is required, add the ‘Legal Review’ label before sending.
Pro tip: Use labels to sort by urgency and constraints.
Capture decision makers and context
Add a ‘Stakeholders’ card for each decision maker with role and decision power. Use ‘Audience & Competitors’ to note who they target and who they fight. These live under the same lead so you can scan context quickly when answers arrive.
Review answers and draft scope
When responses land, move the card to ‘Answers Reviewed + Scope’. Attach the exported PDF or summary file. Fill the ‘Scope & Constraints’ micro‑template with deliverables, assumptions, out‑of‑scope, and risks. Add a due date for proposal delivery and tag Budget Fit / Timeline Fit as appropriate.
Build and send proposal
Use ‘Proposal Checklist’ to confirm scope, pricing, timeline, terms, and next step. Attach the proposal link or file. Move the lead to ‘Proposal Sent’. If you need signatures or NDAs, attach those files so handoff later is clean.
Pro tip: Keep one checklist per proposal to avoid scope drift.
Track follow‑ups and handoff
Use tasks for reminder pings and assign owners. Keep labels updated so the pipeline view shows risk and urgency at a glance. When accepted, create a handoff card with key artifacts and portal‑link it into your delivery board.
What’s inside
6‑stage pipeline
From New Inquiry to Proposal Sent to keep momentum
Reusable mini‑cards
Stakeholders, KPIs, audience, stack, scope, proposal
Smart labels
Budget fit, timeline fit, NDA, legal review
Demo items
Realistic examples with assignees, due dates, files
Exportable hero
Share the plan as images or a link
Why this works
- Turns vague answers into a concrete scope
- Keeps decision makers, goals, and risks visible
- Forces follow‑ups with owners and due dates
- Labels expose budget, timing, and legal constraints
- Maps left→right progress to reduce stall outs
FAQ
Can I use my existing form?
Yes. Attach your Typeform, Google Form, or Notion form link on the ‘Questionnaire link sent’ card and keep all notes in Instaboard.
How do I adapt labels?
Edit or add labels like Budget Fit, Timeline Fit, or Legal Review so your team can filter and prioritize quickly.
What counts as a micro‑template?
Small, reusable cards (Stakeholders, KPIs, Scope) you duplicate and fill — not the lead itself.
Where should I start?
Always start in Get Started, duplicate the two micro‑templates, assign the owner, then move the lead into the pipeline.